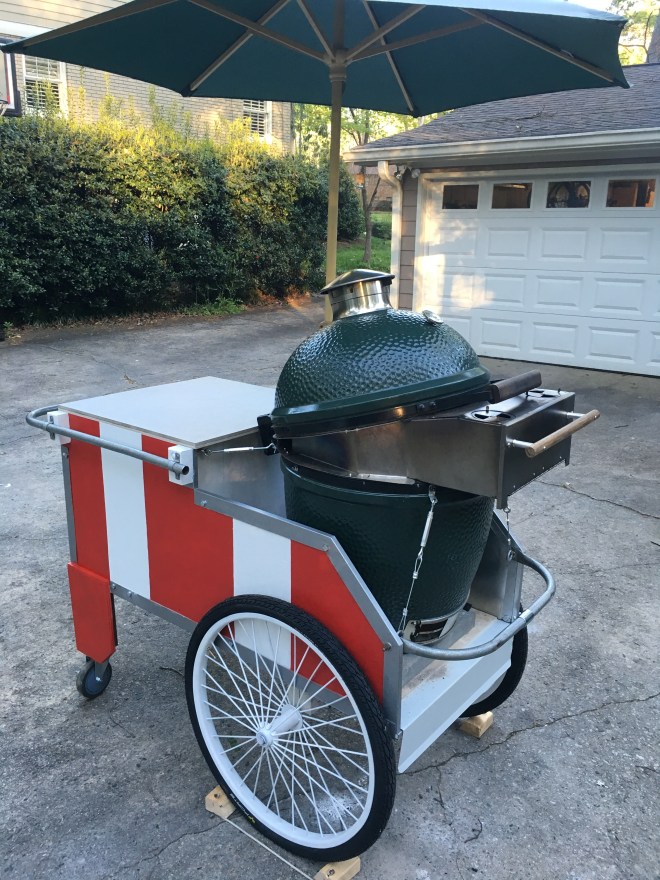
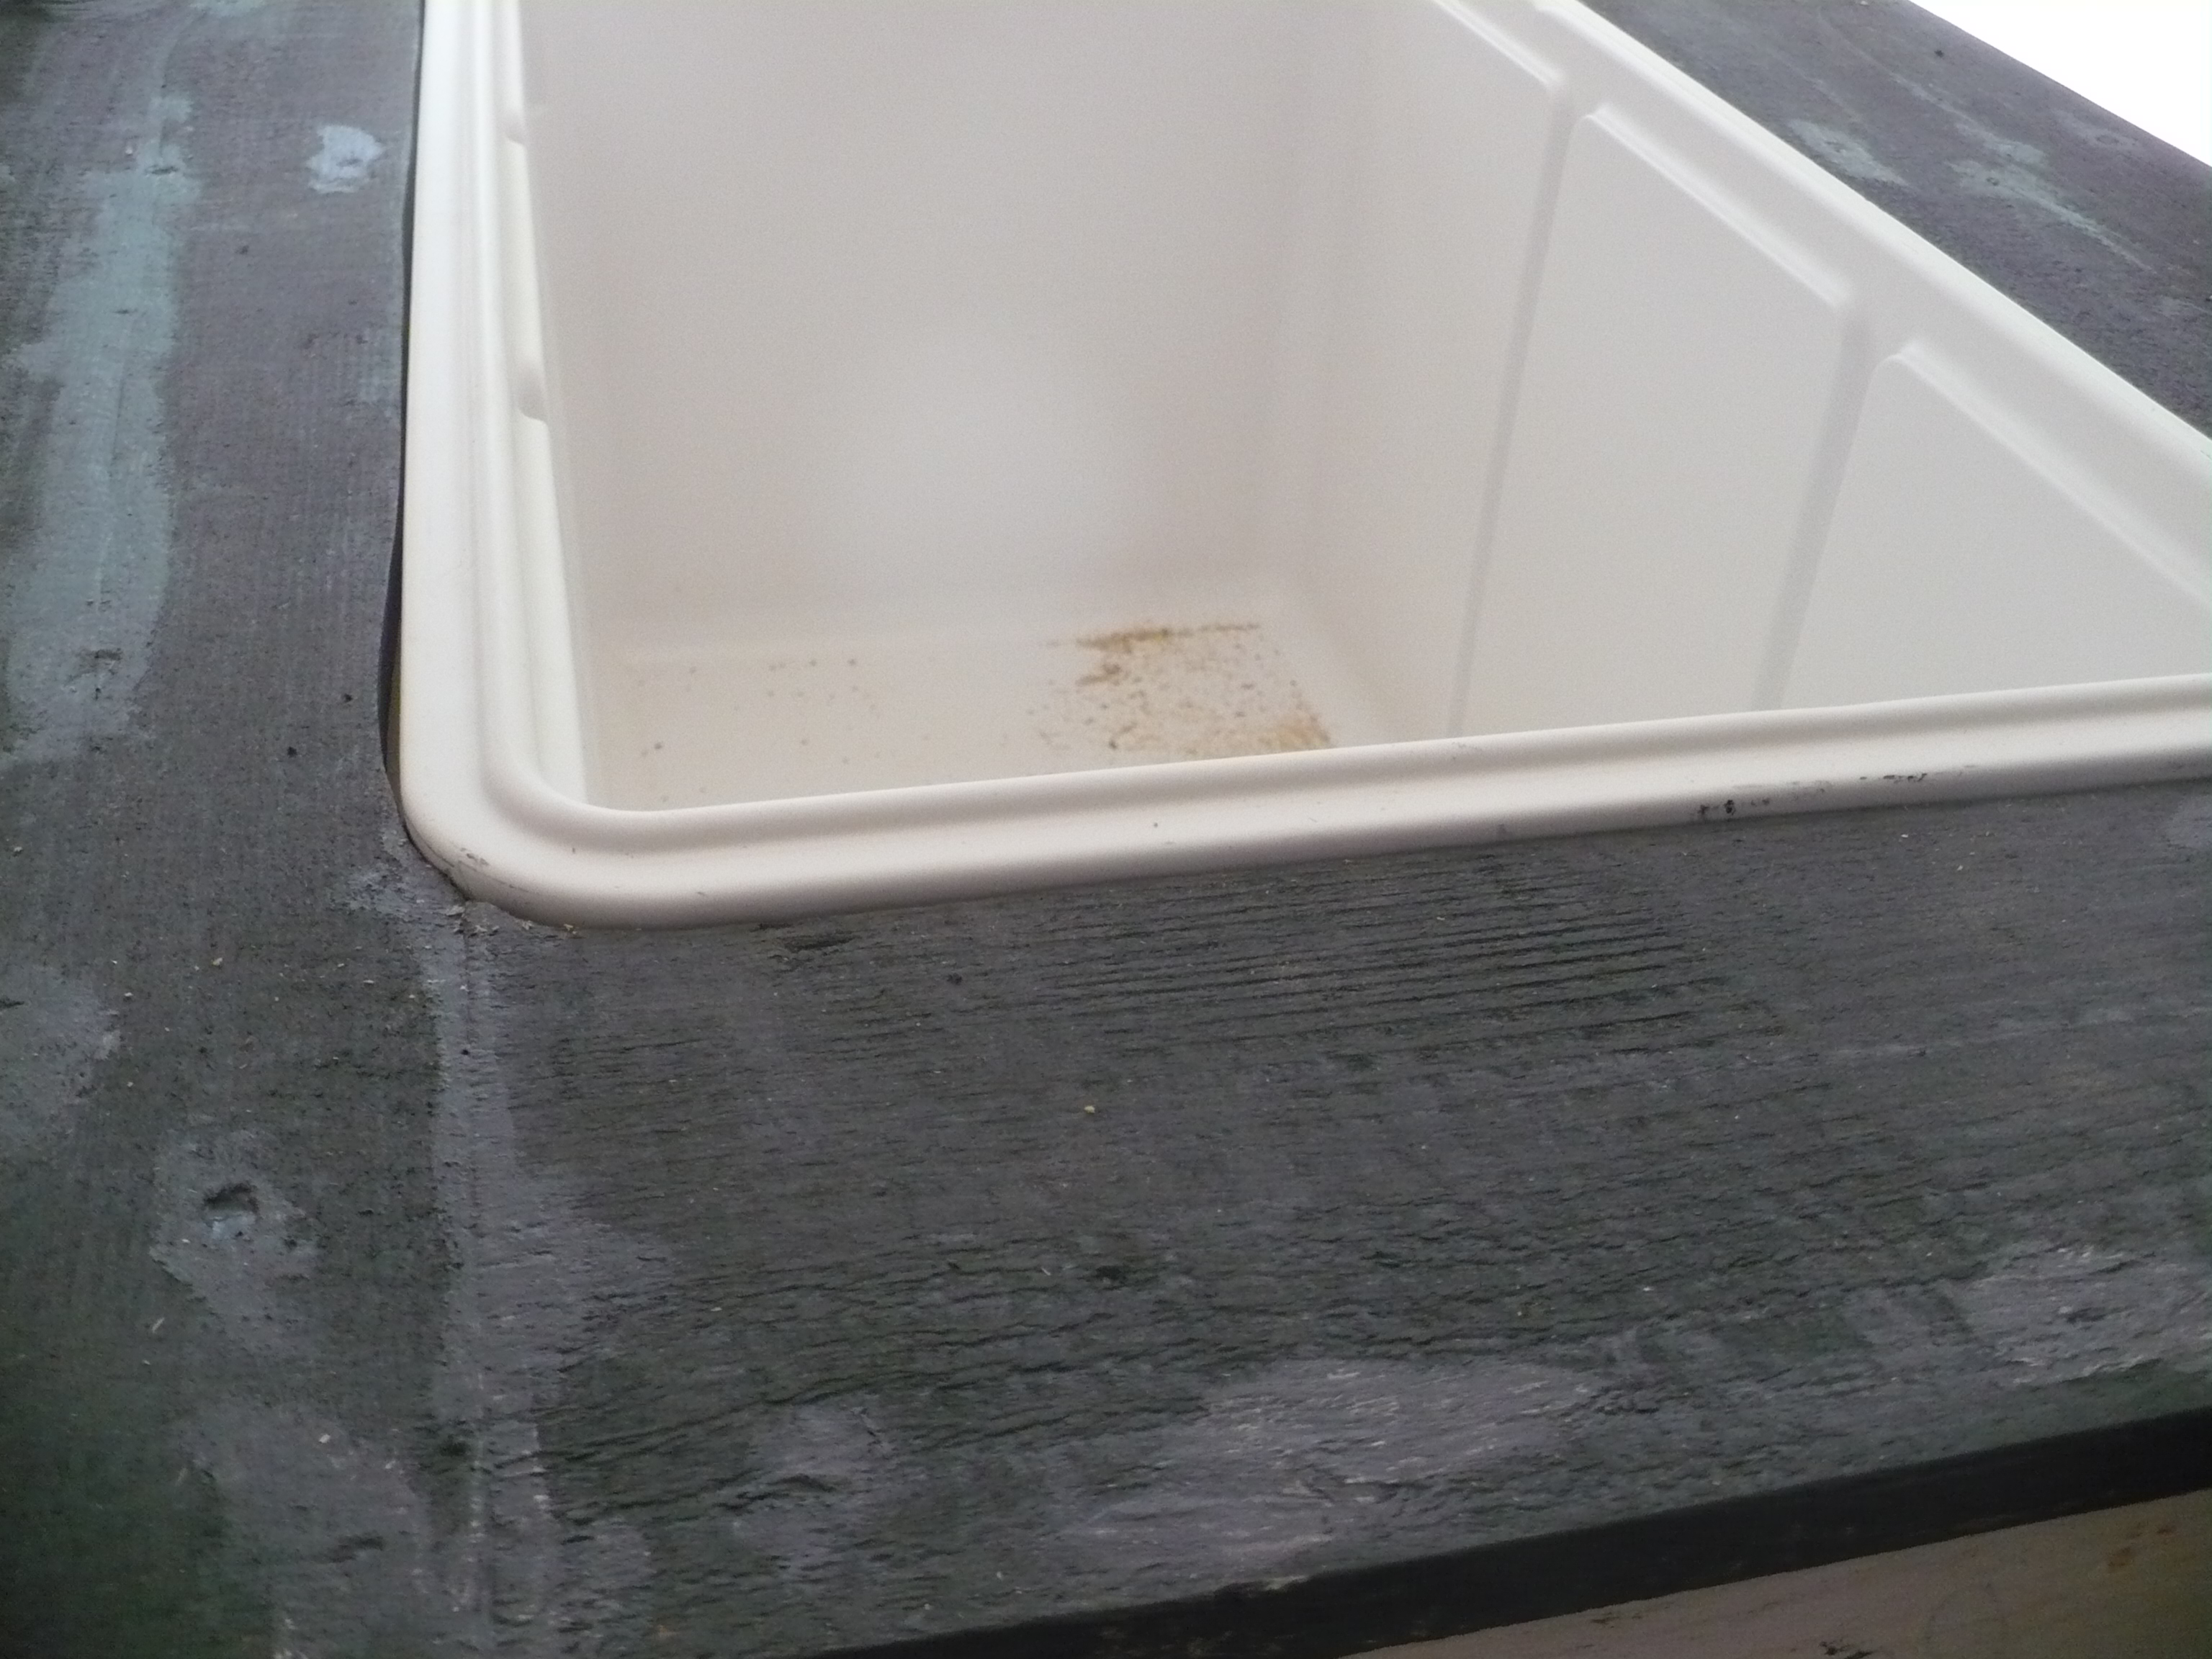
This was my image of how the garden wagon looked that was stored under the porch.
Let me go back. I needed a way to transport my Big Green Egg(R) for events and for backyard pizza demos. I found out that my father-in -law had a cart like the one pictured above. He warned me that it had been outside for some time, but I was welcome to it. The price was right. (I was not thinking of an Upconfigured entry so my photography of the “before” is not very thorough)
There is one other challenge in this story. The wagon must fit on a scooter tray that fits in a trailer receiver – that means 28″ wide. So, I started with a survey and found that the cart was in pretty poor shape. I decided to persevere. Upconfiguring never starts pretty!
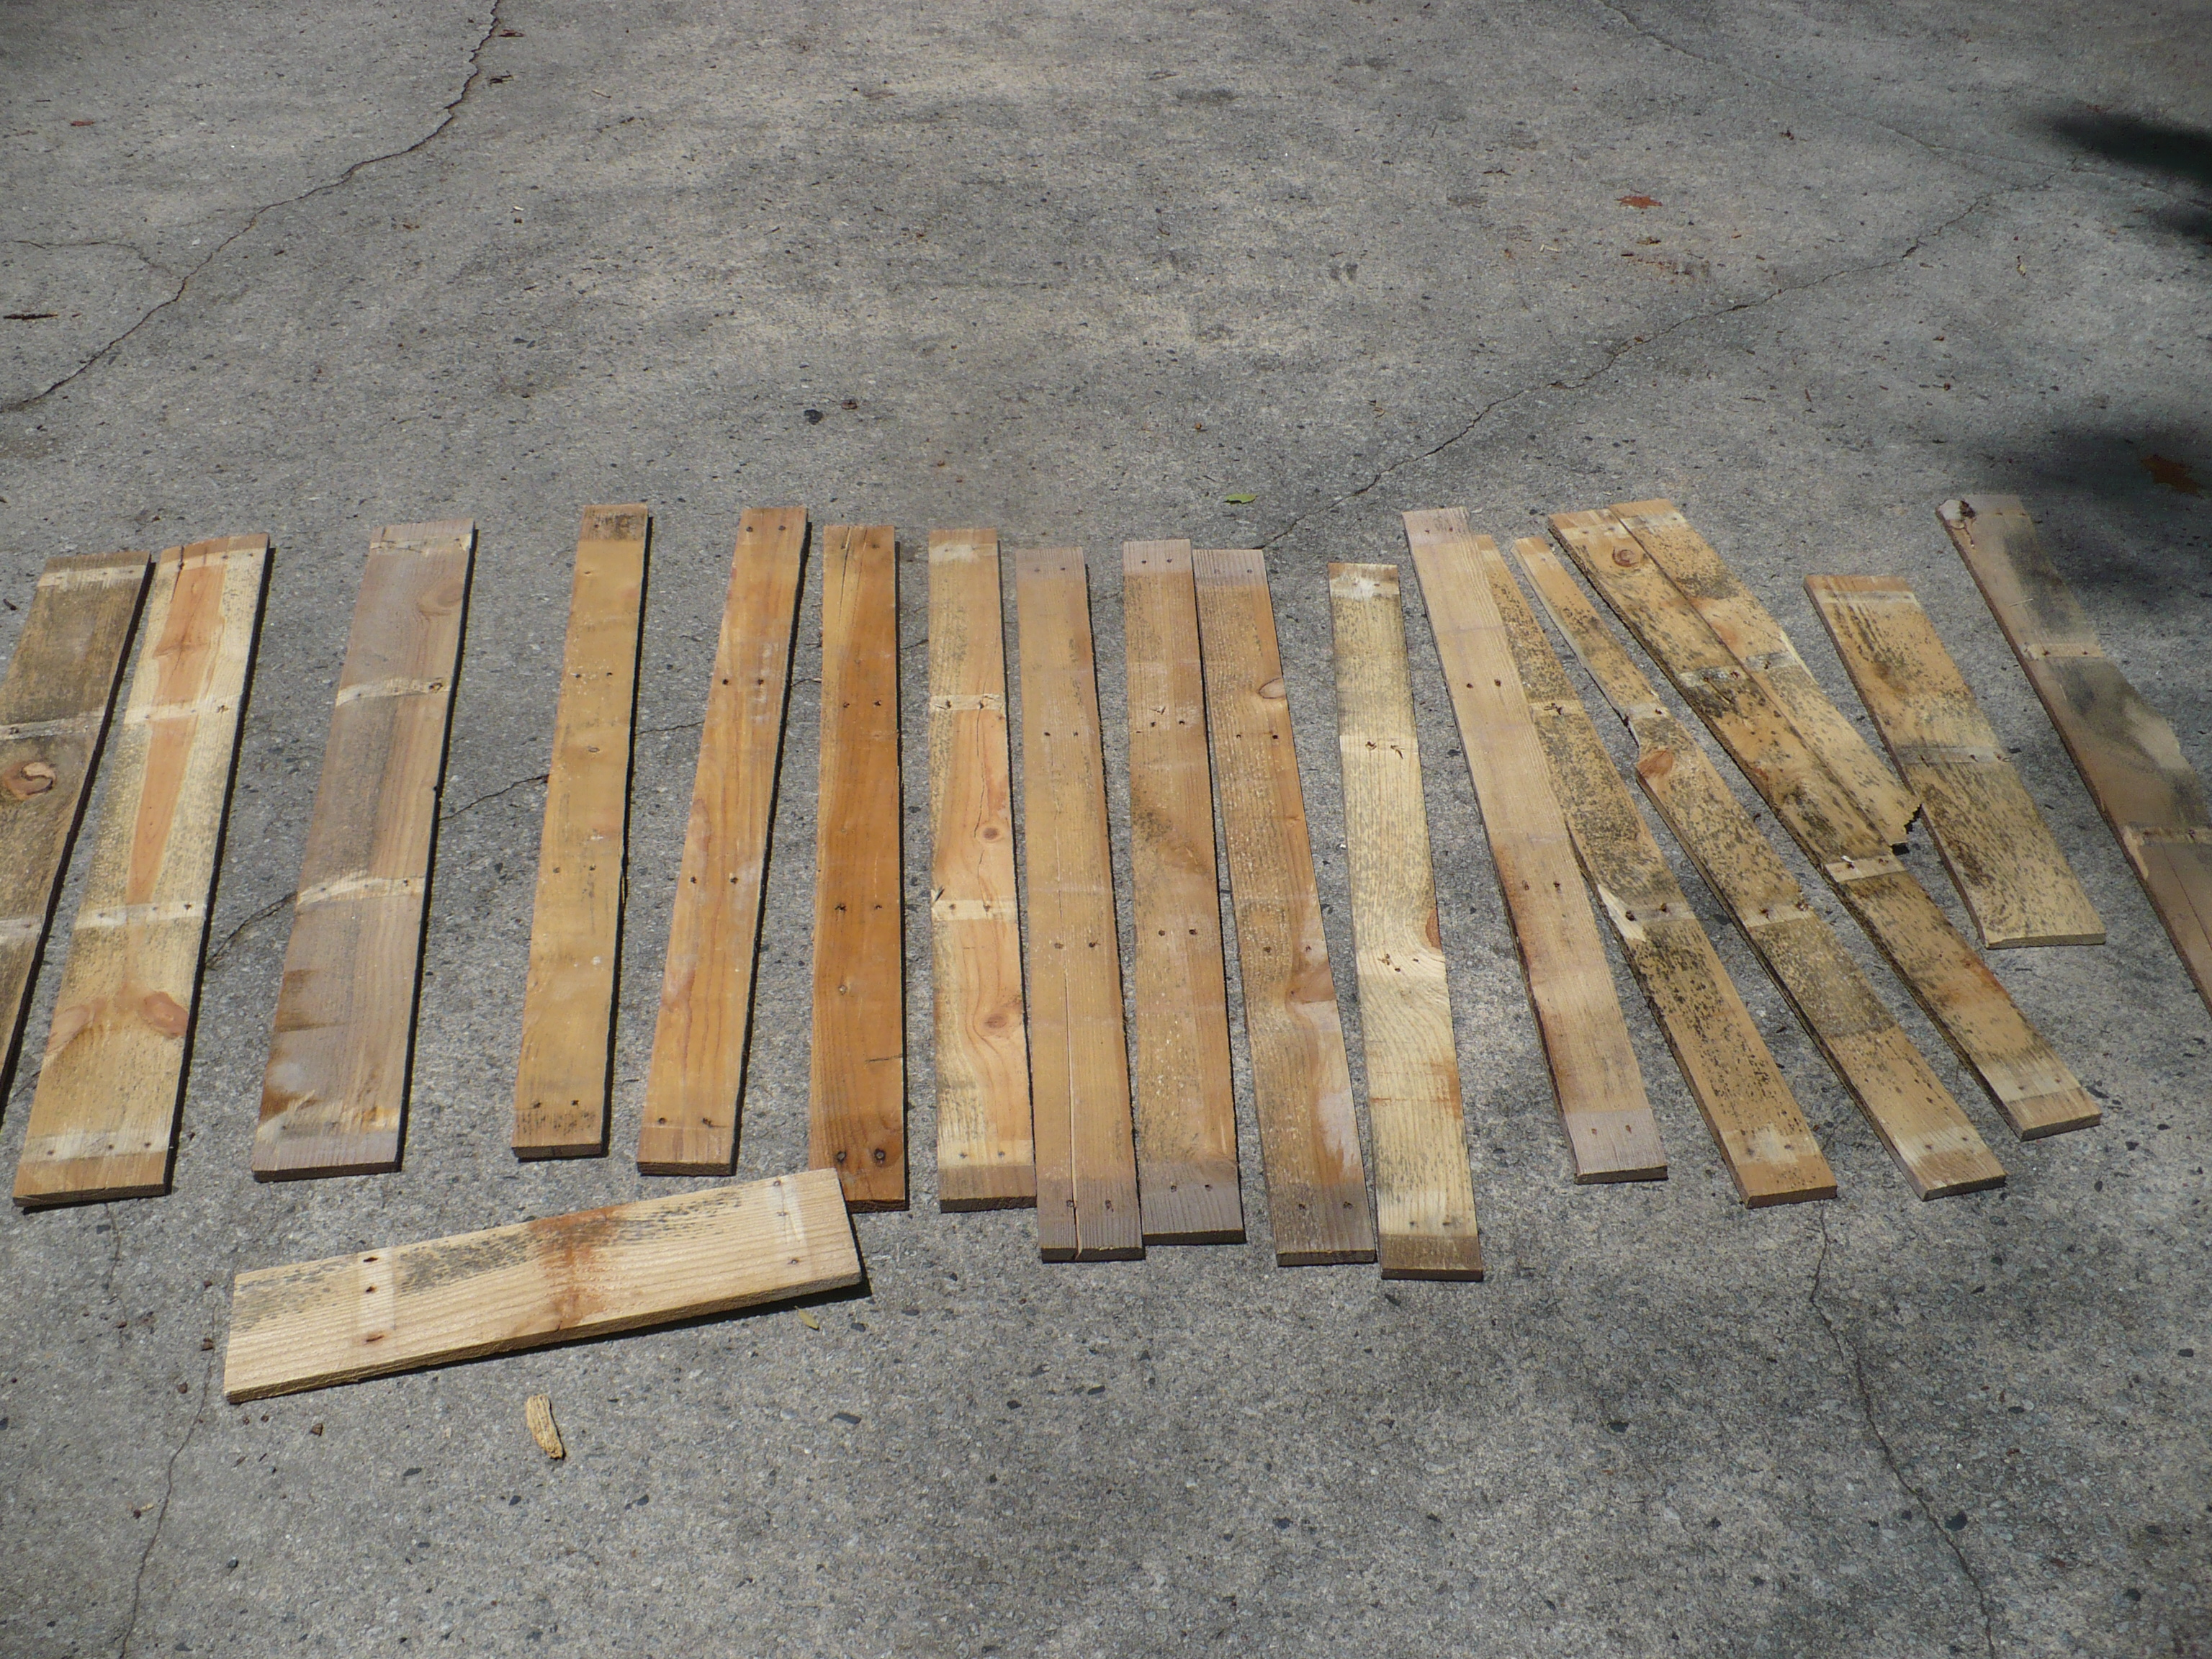
Turns out all of the plywood was a write-off. It was good material originally, but the years spent outdoors had compromised the layers. I pulled all of the metal off the cart and made a big pile. Most of the metal was in good shape, given a little hammered spray-paint treatment for aesthetics.
The wagon was 36 inches wide, so I took all the cross pieces and figured out where to cut them for the least impact. I mitered the corner of this piece shown below and bent it to make a smooth corner edge.
I purchased exterior plywood and a whole new set of nuts and bolts. While checking out at Lowes I realized that it probably would have been a better idea to buy a new cart! But – onward.
I now had a rusty pile of parts, a new sheet of plywood. and a bag of connectors. It was time to figure out how this cart should look. I did some Sketchup work. I arrived at this 3D drawing. (The BGE, umbrella and wheels are all imported drawings – thanks to the Sketchup community for making them public)
When cutting the sides out of the plywood, I discovered that there are two kinds of 1/2 inch plywood – the kind that is a little thinner than 1/2 and the kind that is a little thicker than a half. I picked a sheet that had a better face and better ply structure, not paying any attention to the specific thickness. Low and behold none of the metal edging would fit – I hate it when I feel like an amateur at DIY projects. So, now I needed to break out the router and trim a small edge wherever there would be a metal border.
Dang
It added an hour or so, but in the end thicker plywood makes it a sturdier cart – right?
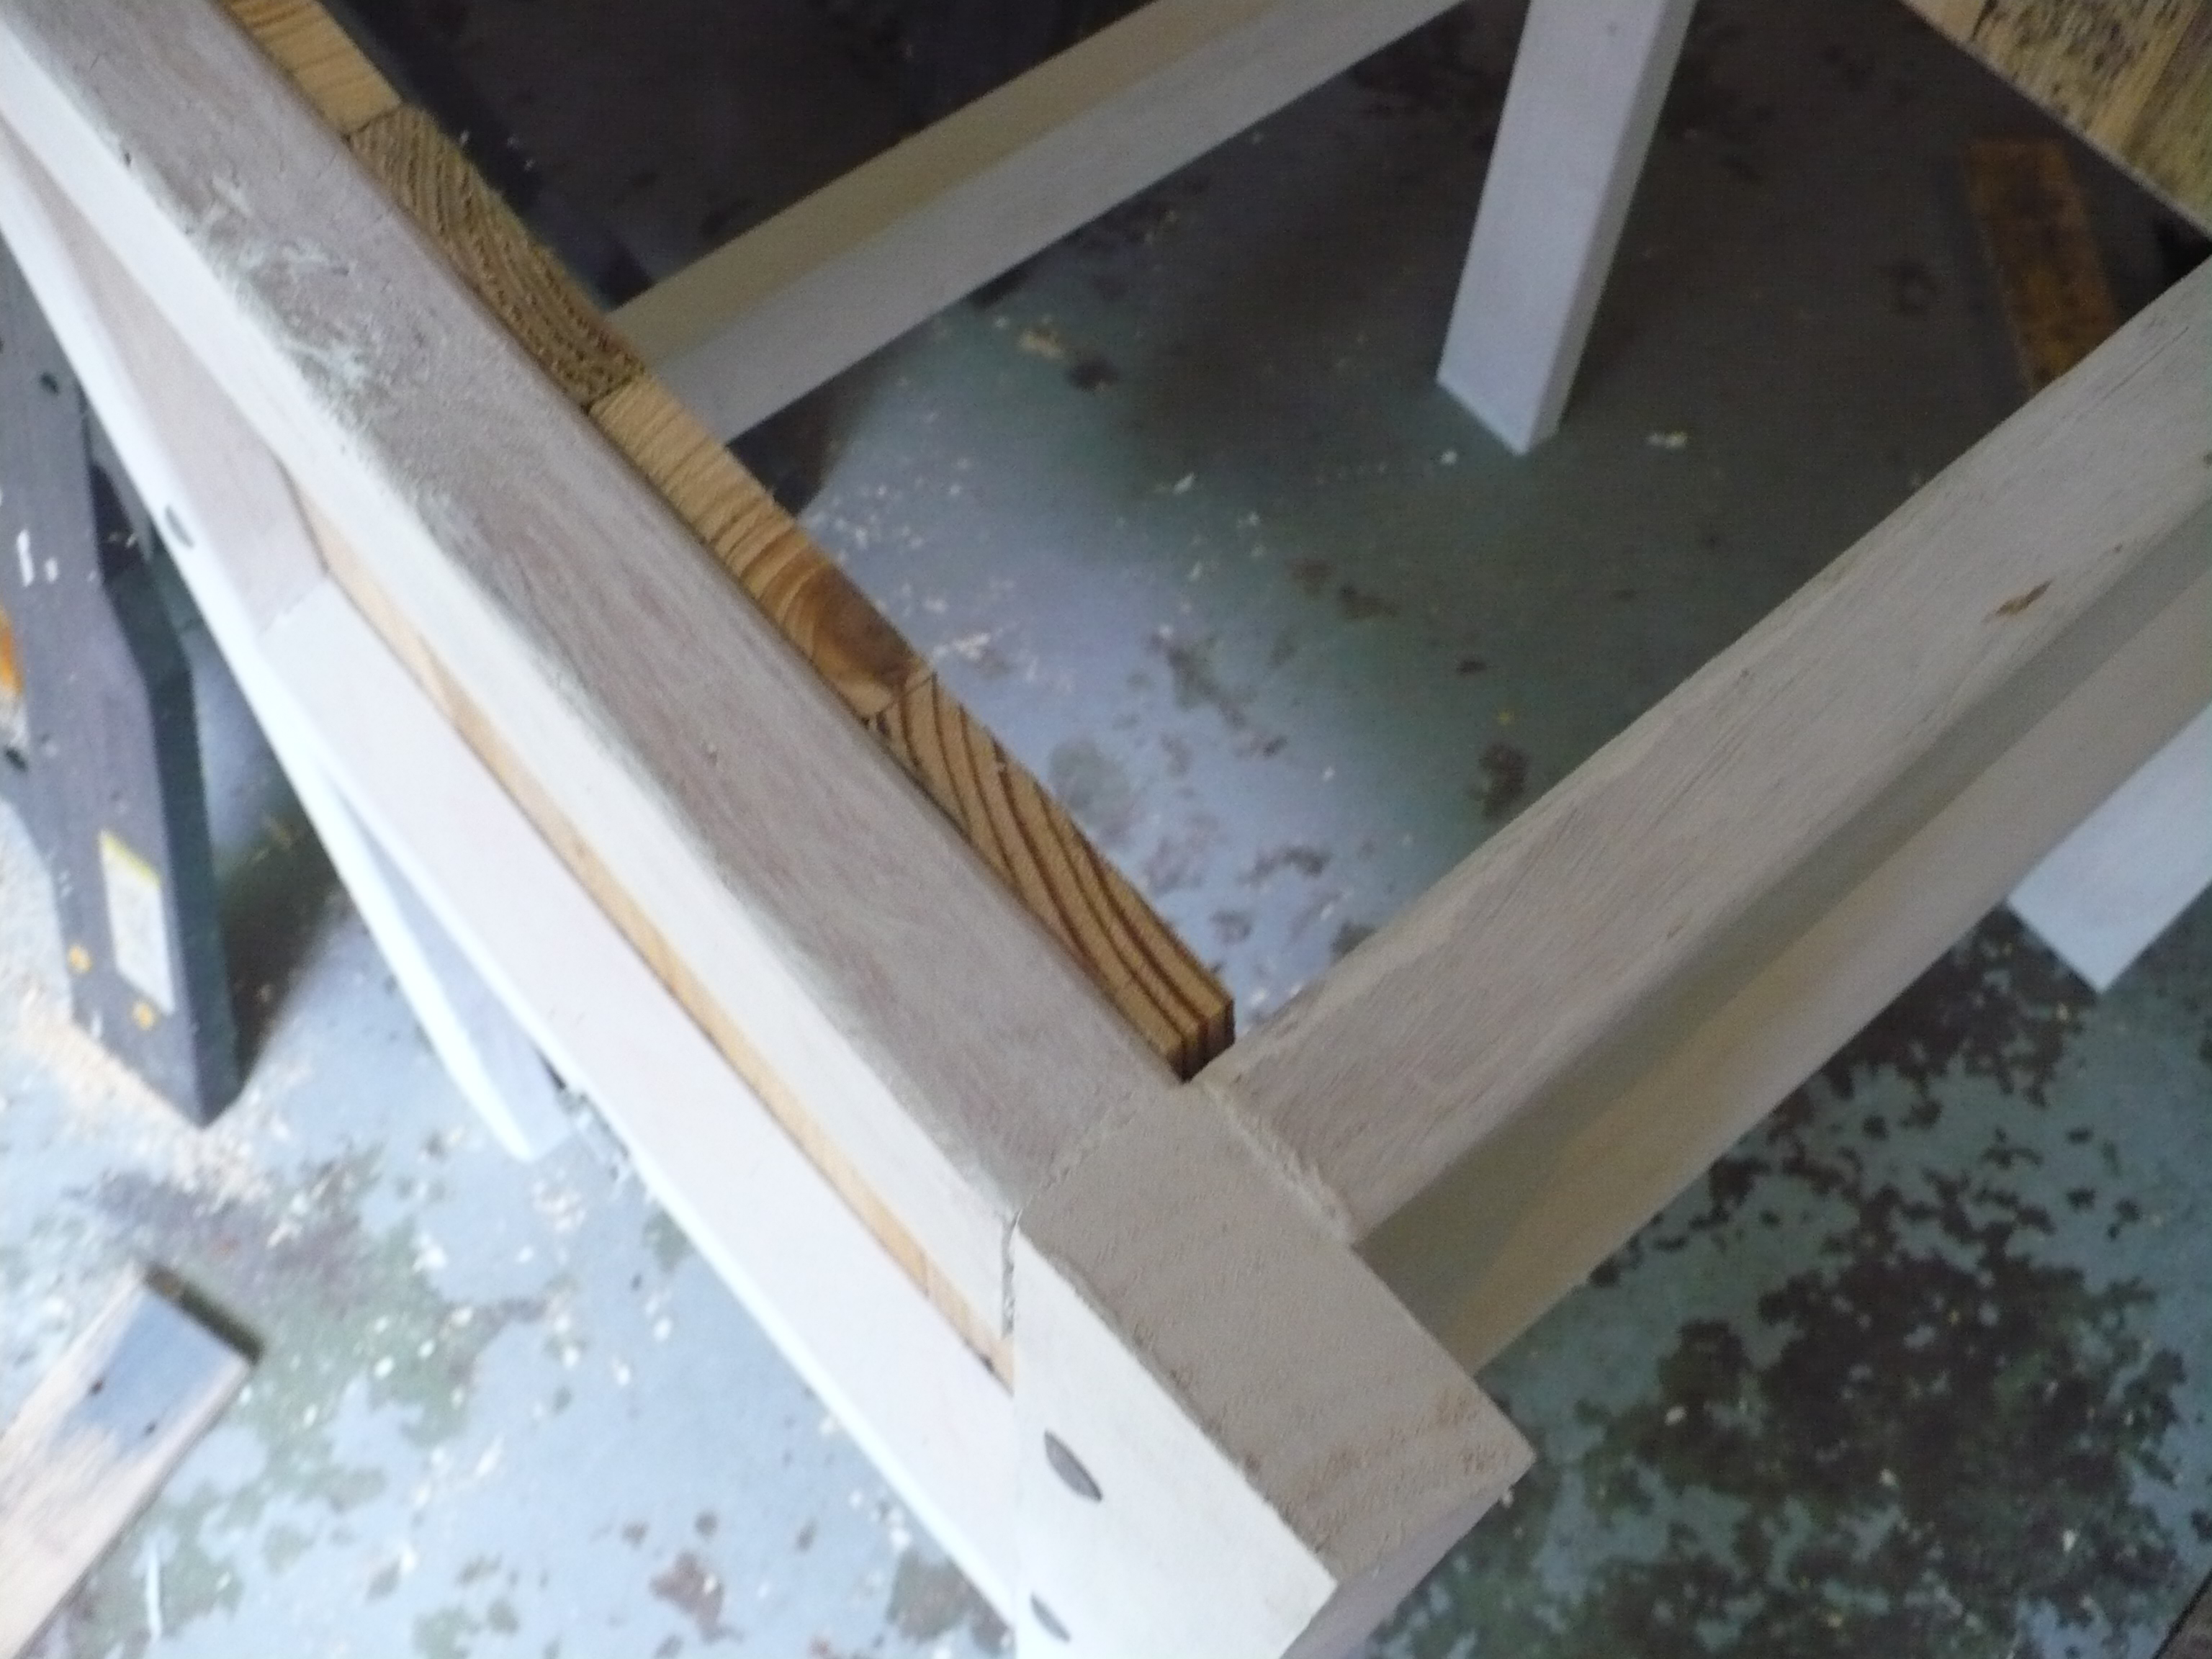
I began putting all the pieces together and the cart took shape. With my width requirement and the size of the egg, I had to raise the body between the spokes – a couple 2X4’s made a good riser. The axle is bolted to the bottom.
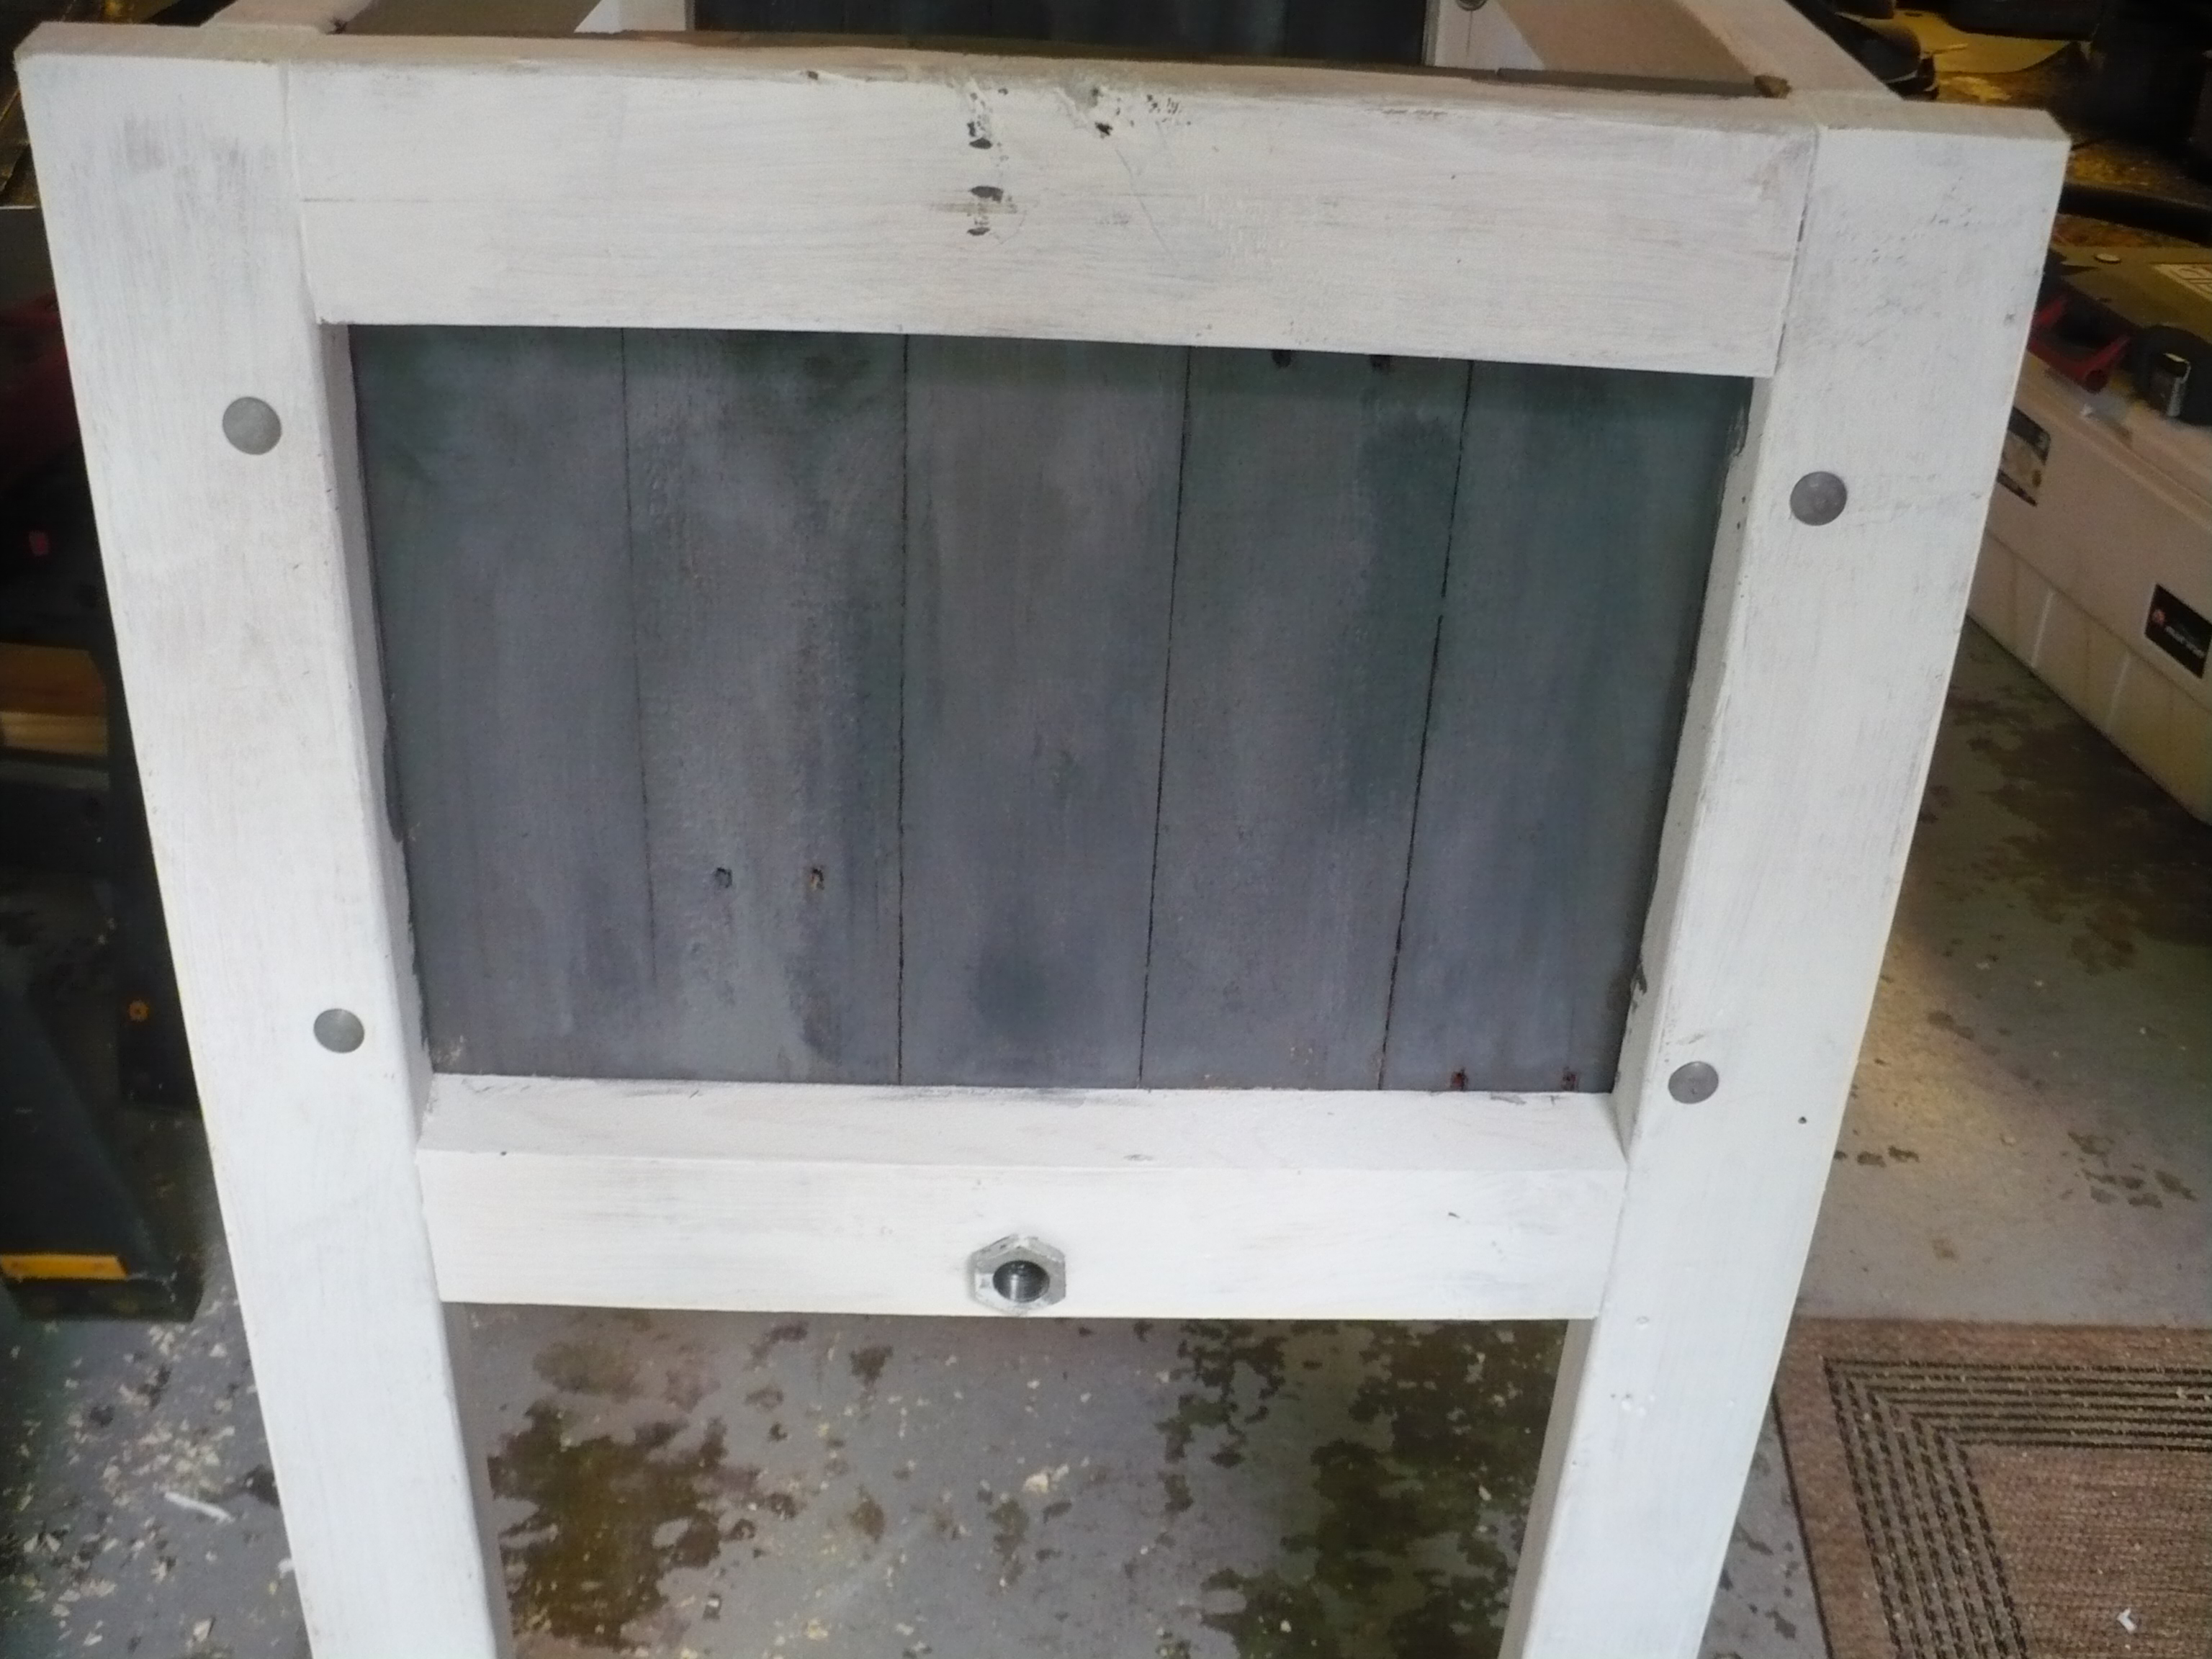
I could not build the front posts for the caster wheels until I knew the back height with tires. I assembled the big wheels with new tires and then created the appropriate height risers for my 5″ casters. The plywood was a left over piece from the other cutouts and gave it a better look than just the posts as in my initial plan.
A 600F degree BGE would be mounted on the back so I added aluminum flashing around the inside and under some Hardie-backer used to protect the floor board. I am hoping the aluminum will reflect the heat so that the plywood does not get too hot.
Finally it was ready for the BGE.
I placed “the Egg” in and added some small steel angle brackets bolted to its hinge ring. I added turnbuckles to the four corners and tightened it in. This suspension should keep the egg from tipping out of the cart.
The sides are obviously not strong enough to hold the weight of the egg, so I cut one of the wagon parts to span the opening by the eyelets. This will support the edges and the cable fittings with turnbuckles will hold the BGE in place. Note that I glued a cement block to the floor. After further thought I will be adding a small ledge around the egg base so there will be even less chance of movement.
The flat surface behind the BGE is a 23″X23″ ceramic tile glued to a Hardie-Back panel. I simply glued the whole assembly on to this cart.
One final design point. This cart may seem to have a weird configuration. The prep side is on the other end from the business side of the BGE. The 28″ requirement kept the cart narrow, and the extra weight of the egg needed to be over the big wheels, not the casters. For my pizza cooking, this works pretty well since pizza prep is separate from putting things in the oven, but for basic BBQ operations the table seems in the wrong place when you want to set down a tray. Something to think about if you are making a cart.
So, that is it. An old rusty, rotten cart upconfigured to an event trailer for the Big Green Egg. I added an umbrella holder, made some chocks, and will be putting in some shelves. I did a pizza cook test and the aluminum flashing is amazing at protecting the wood from heat. The edges closest the the base reached only 130F degrees after 2.5 hours of a 600F degree cook. I am excited that this worked so well.
One final consideration – I will be removing the fragile ceramic internal bits inside the Egg before I push this across a large expanse.
Thanks for reading, Here are some final pictures. Subscribe to see more projects in the future!
I came across a Nextdoor post of a neighbor who had some granite from a kitchen remodel. I have been looking to make a pizza table for my Big Green Egg. A granite top would be perfect for making pizza. I responded and found two pieces with nice edges. I have a tight space on my deck, so a traditional long BGE table with a hole cut for the egg would not make sense. I used these pieces as the starting point of the design.
I drew up a couple of different plans with dimensional lumber – and then remembered that I have a couple garage door parts left over (See my first blog). It turns out I have just enough for this project.
Gathered up parts
I took the dimensions and did a little Google Sketchup work to get to this design:
Now to begin the process:
I used my Circular saw guide to square up the panels.
Some galvanized staples to firm up the panels.
I cut full width pressure treated boards to screw in from the bottom, and then inserted and screwed and glued cross braces at the top corners. The door panels have siding on one side and framing on the other. I chose to put the siding on the inside so that the raised panels showed on the outside.
Straight rolling wheels in the back and locking swivels in the front.
The back could have been any number of materials. I chose to use cement siding so that water is never an issue since this will live outdoors. I cut three sections and attached them to the back of the cabinet.
Sometimes luck trumps skill. I designed and built the box tied to the dimensions of the garage door panels and with the granite top. I wandered down the aisle of Lowes and found this ceramic tile on clearance (yes it is ceramic) tile. I expected to be cutting ceramic, or caulking a gap on the side. They dropped into the space perfectly – I mean 1/16 of an inch clearance on all sides kind of perfect. Glued them into place and moisture won’t affect this cabinet.
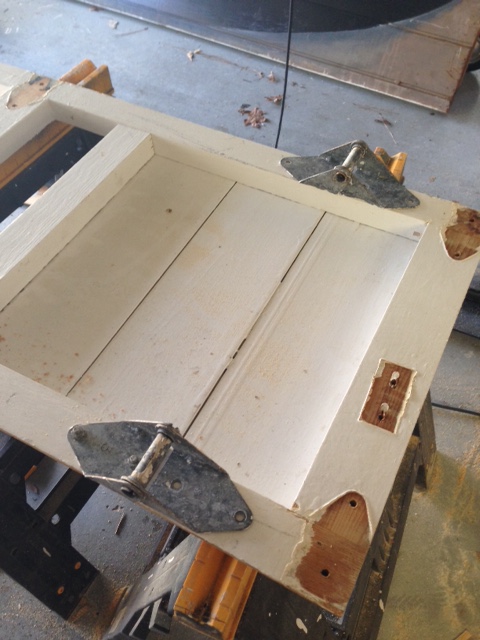
A dry fit of the door – with a cabinet handle added.
This is the base cabinet, but since I had the other granite piece I devised a prop to have it fold up for more counter space. A couple of hinges and some figuring led me to this layout. The supports needed to fold into the panel section, and the support needed to hold up a pretty heavy piece of granite. This was not in the Sketchup, but a compass and few scenarios helped me figure out the chord lengths. I was off by about 1/4 an inch and it did not work the first time. Pretty specific combination of lengths to make this work.
The wooden top piece will glue to the granite – I am testing the new Gorilla adhesive in a caulk tube.
I added some shelves inside, a magnetic catch and here is the final cabinet. These shelves can take heat and will not warp with moisture and weight.
All completed and in place, the cabinet holds all of my Egg accessories out of the weather, and more importantly out of my wife’s sight!
I received a great recommendation of adding an umbrella support. I think I need some hooks on the side and a holder for the pizza peel. – Next week.
Thanks for reading this entry – subscribe to see more in the future.
The fun of these projects is in the problem solving – and I found a whole lot of fun in this build. I got inspired to make another, different cooler. This is intended to be an adventure log, not an instruction manual – sharing challenges and conclusions. I do not go into specific details on how to build this cooler, but offer tips and tricks along the way so you can have your own adventure.
I started with a dumpster diving expedition and found these items. This cooler stand may need to live outside so I was looking for rain resistant items.
A purchased cooler, some lumber, some roofing material and 2 pallets (not shown)
In my last project, using a found wooden garage door drove the narrative of the entire project. It was easy to decide on height and width of the panels because they were dictated by the size of the existing panels. The dimensions of the door aligned well with the cooler size, the door siding was just the right size to cut for the top. The objective became fashioning everything on the cooler from some piece of the garage door. Using hinges, brackets, and all of the fittings without purchasing new material. On this build I gathered the roofing, some metal trim, a couple of beat-up 2X pieces of lumber and a couple of pallets. I have admired the stands that use pallets for their rustic look and feel and I was determined to make another project that is “upconfigured”.
I began taking the pallets apart and figured out that there are pallets, and then there are real pallets. These pallets were one-time use pine pallets for paving stones. Spiral nails are incredibly good at holding wood together, and when coupled with pine boards, deconstruction leaves you with piles of shattered boards. I ended up cutting nails to disassemble the pallets and realized that they were not going to be a great source of material.
Cutting nails with a reciprocating saw to separate palletsHelp is appreciated when it is time to deconstruct pallets.
I found that the wavy red material is a kind of shingle – perfect for a roof, but probably not tough enough to be mounted vertical, and would be difficult to attach in any configuration of a cooler. So, overall, material gathering didn’t turn out so well. If I was on an HGTV show the pressure to finish in a day would be high drama given that my materials were not completely suitable and we would go to a commercial break.
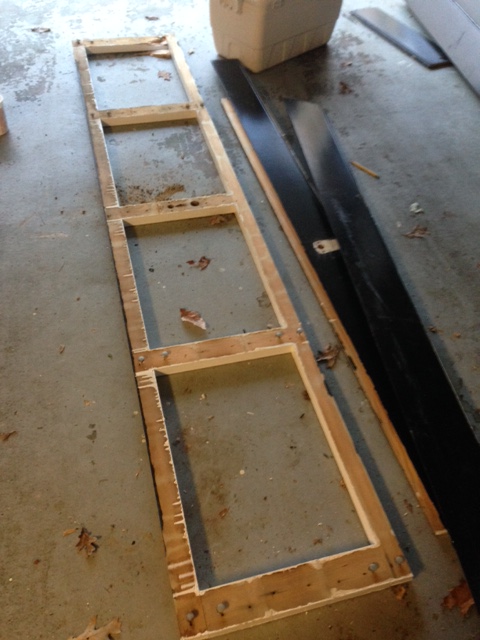
So I moved to “Plan B”. Build a solid frame out of the 2X lumber and decorate with the pallet wood. I sketched up a design and got started. As this stand might live outside, I remember back to all the Norm Abram “This Old House” lessons I have learned. Water is the enemy, and you should make sure not to leave a place for it to stand. All of the cross members would need to be sloped so that the water would shed. I ripped long pieces with a 10 degree angle on the table saw.
End View – bottom of the front panel.
Since these pieces would be fastened and glued together I prime all the surfaces so that the nooks and crannies would be protected from any water intrusion.
I have been reading about how great the Kreg pocket hole cutter works on this kind of project, so I hit Amazon and gave it a try. A couple tips for using this device. 1) practice on a couple of scraps, 2) buy more clamps, 3) clamp everything exactly how you want it and then drill and glue and screw it together – all while clamped. I had everything lined up on the first attempt but the boards drifted out of alignment when the screw grabbed. This is a good application for pocket holes because there are redundant attachment points for these frames. I used Gorilla glue throughout to ensure good adhesion in the weather.
The new Kreg jig – works like a charmAll 4 of the structural panels – completeBuy more clamps, you always need one more! Holding the side perpendicular to the front with a metal square to drill for the carriage bolts.
Once these frame members were completed I used the same lag bolt structure that I used on the last cooler to attach the front to the sides. This is blasphemy to my woodworking friends as mortise and tenons are the best for this construction (maybe the next cooler project), but the look of the lag bolts worked on this construction for some reason.
Four frame pieces bolted together with 4 1/2 galvanized carriage bolts.
Now I had a sturdy frame for the cooler stand and I primed all of the surfaces – but my plan was not working. All the work to pull pallets together did not yield enough wood to do all four sides and a top. So, time to pivot the project again. I got with my top consultant and we discussed that the recipient of this cooler likes metal – so some sort of metal decoration on the front and back would be a good idea leaving the sides with the pallet pieces. Off to Lowes.
Pallet slats all separated – Spread out for cleaning.
The side panels would be made of pallet planks – so I cleaned them up a bit and realized that they did not have the weathered look I was seeking. I stapled them to the inside of the end frames to see how it would look.
End panels cut flush with the top of the frame.Side view – pallet panel in place – rustic, but too new.Side panel after painting pallet panel.
I experimented with some different colorations. I was shooting for a weathered gray look like you find on wood at the beach. The multi-shade treatment turned out pretty well.
Top panels flipped to attach with pocket screws.
For the top ridge around the cooler I took wide boards from the pallet and made a butt-seamed frame that will lay on the top. This seemed more stable than some of the plans online that run board across and then cut out the cooler hole. I think this will also be more stable than the boards joined at 45 degree angles since pallet boards are pretty unstable. The pocket holes are placed toward the middle since the frame will be glued and screwed to the base around the edges.
Trace the lip of the cooler so there is a tight fit.
I like to build in the cooler permanently. I figure that I built it from scratch, I can cut it out and replace it from scratch. I wanted a narrow gap that could be caulked shut. I traced the cooler rim and then used the jigsaw to get a hole with a tight fit. After cutting I painted the top, bottom and the inside edges of the hole for the cooler.
Top after painting top and bottom and attaching to frame. Paint is still wet where holes and cracks were caulked. The cooler will be caulked in once the paint dries.
The Lid.
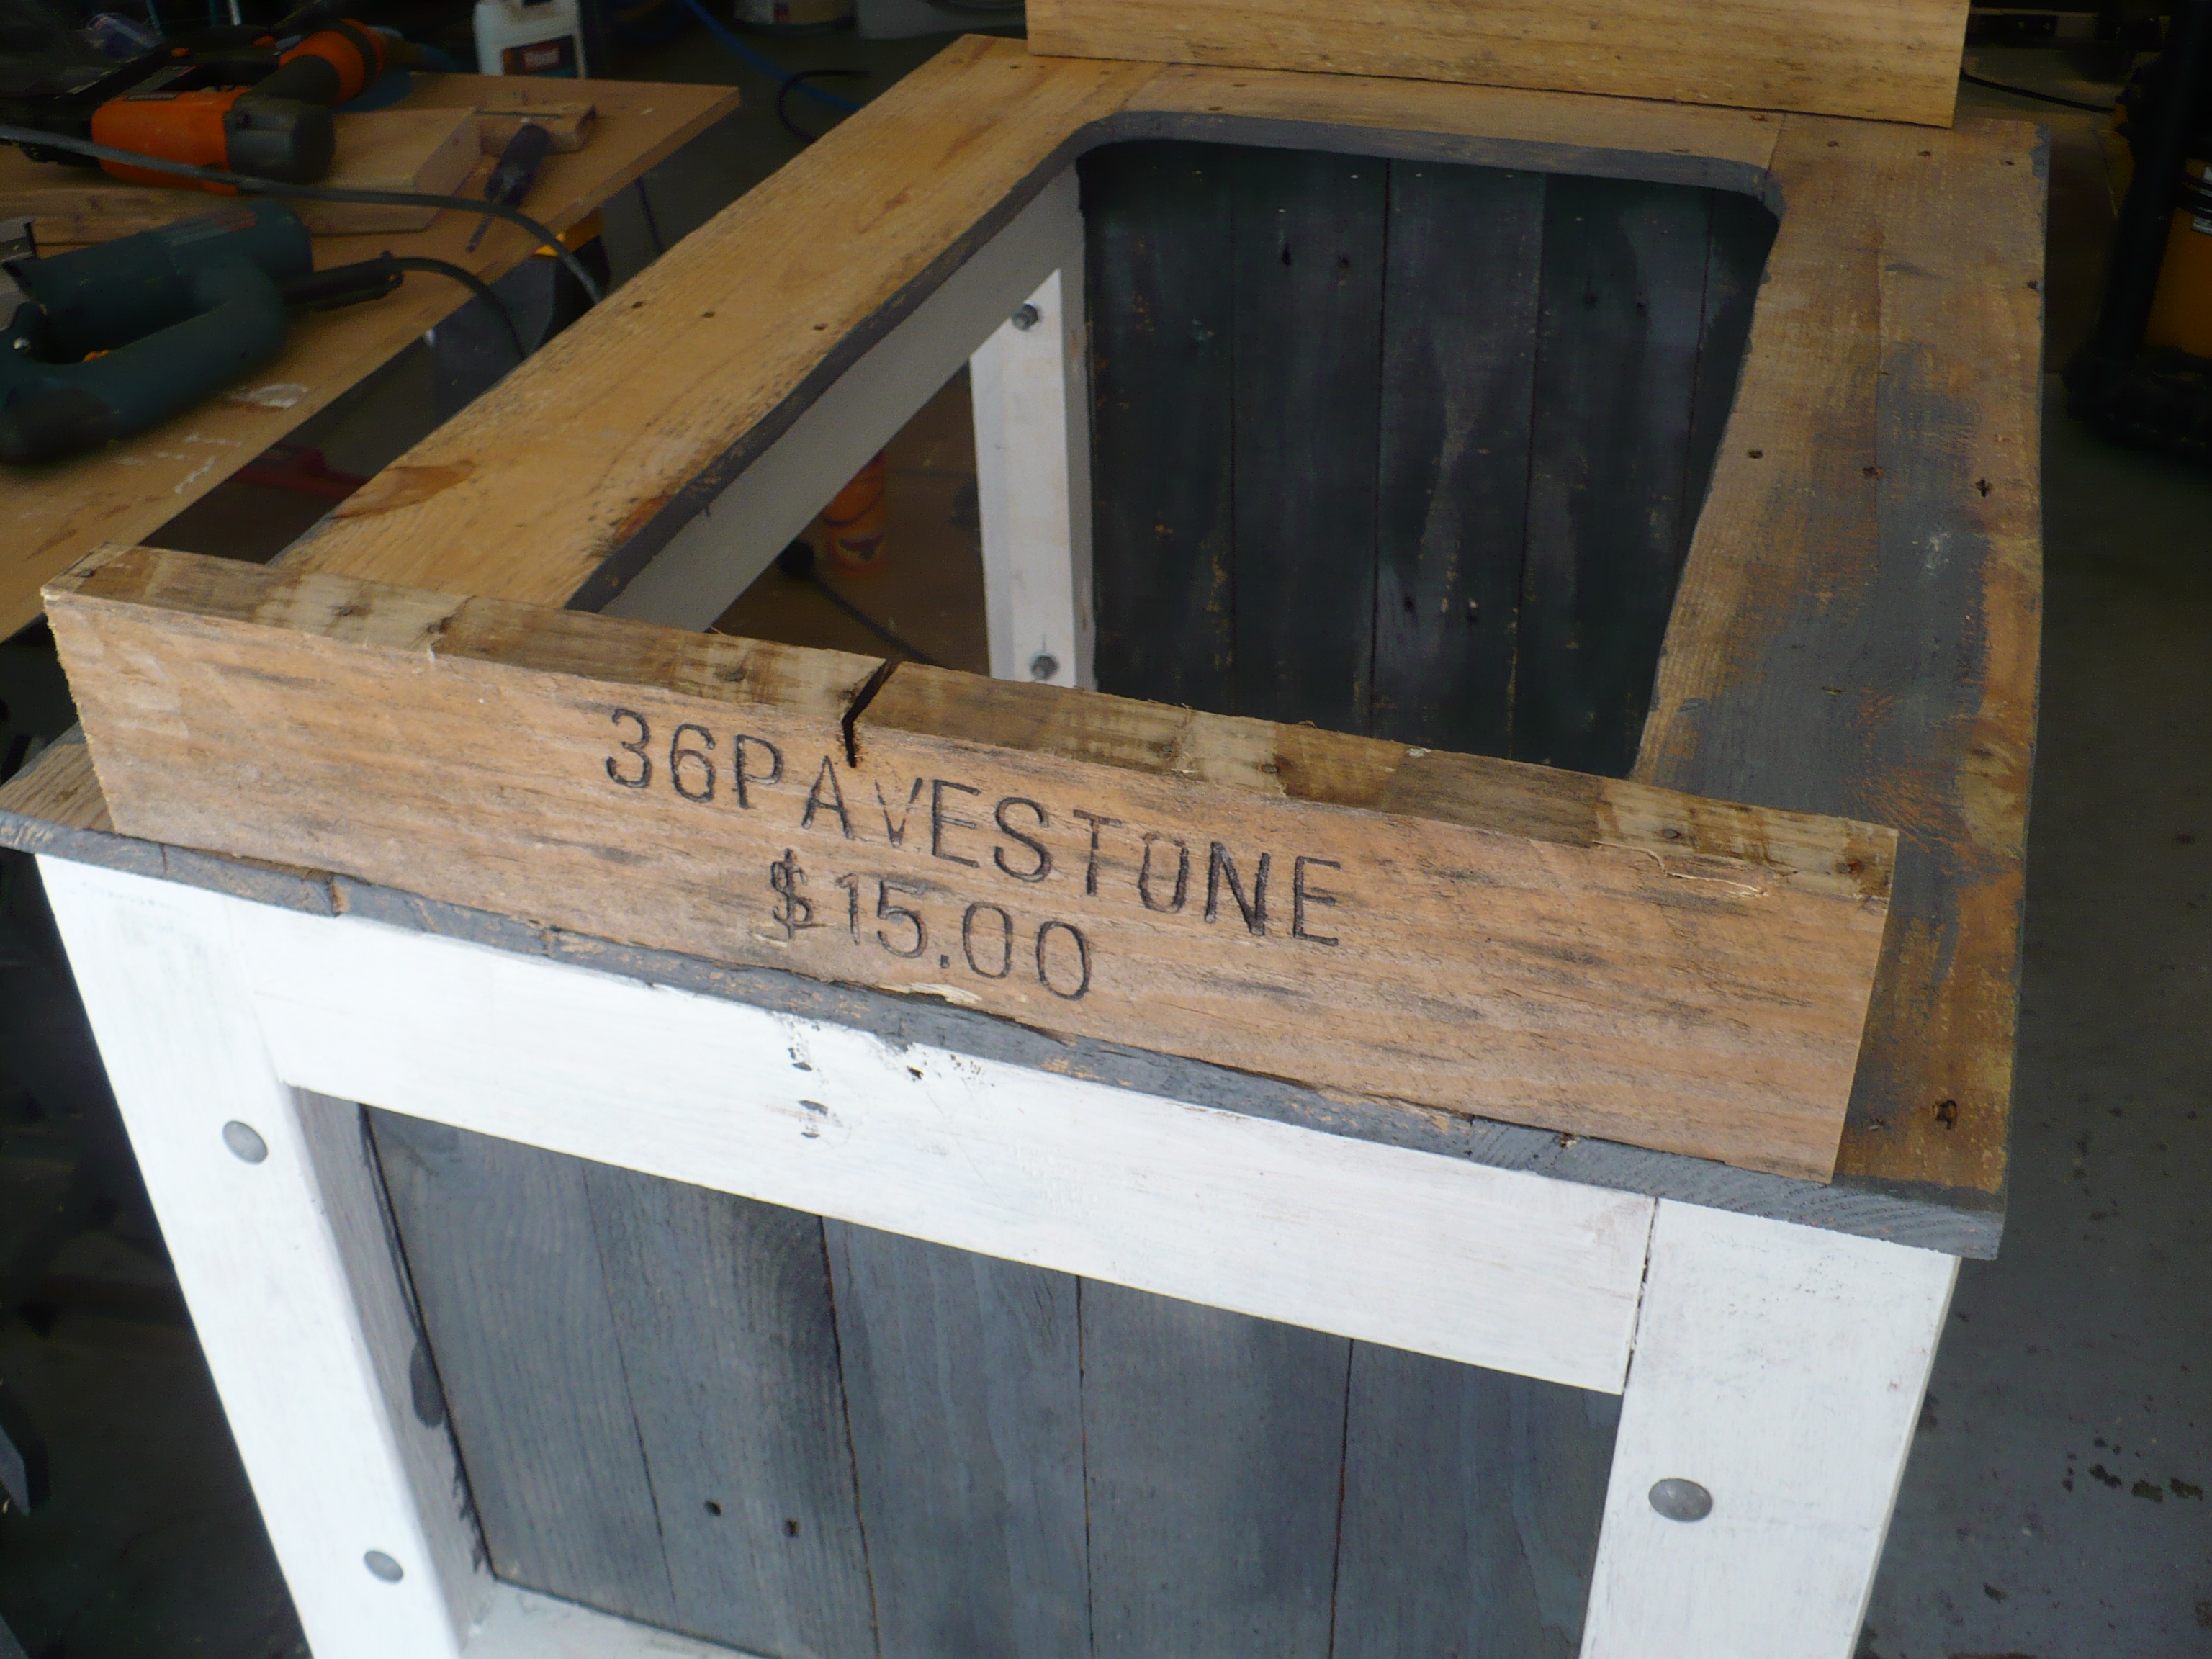
The top of this particular cooler is going to need to be weatherproof. After walking many aisles at Lowes, I formed a plan. I laid out the frame structure using the pallet parts for the frame. I found some galvanized HVAC metal panels designed to clip together in a 2X4 wall. Two of these spanning the top would make a perfect size top. The ends needed to be trimmed, and the center connection would need to be inserted into a cut in the frame – notice the notch above the word “PAVESTONE”
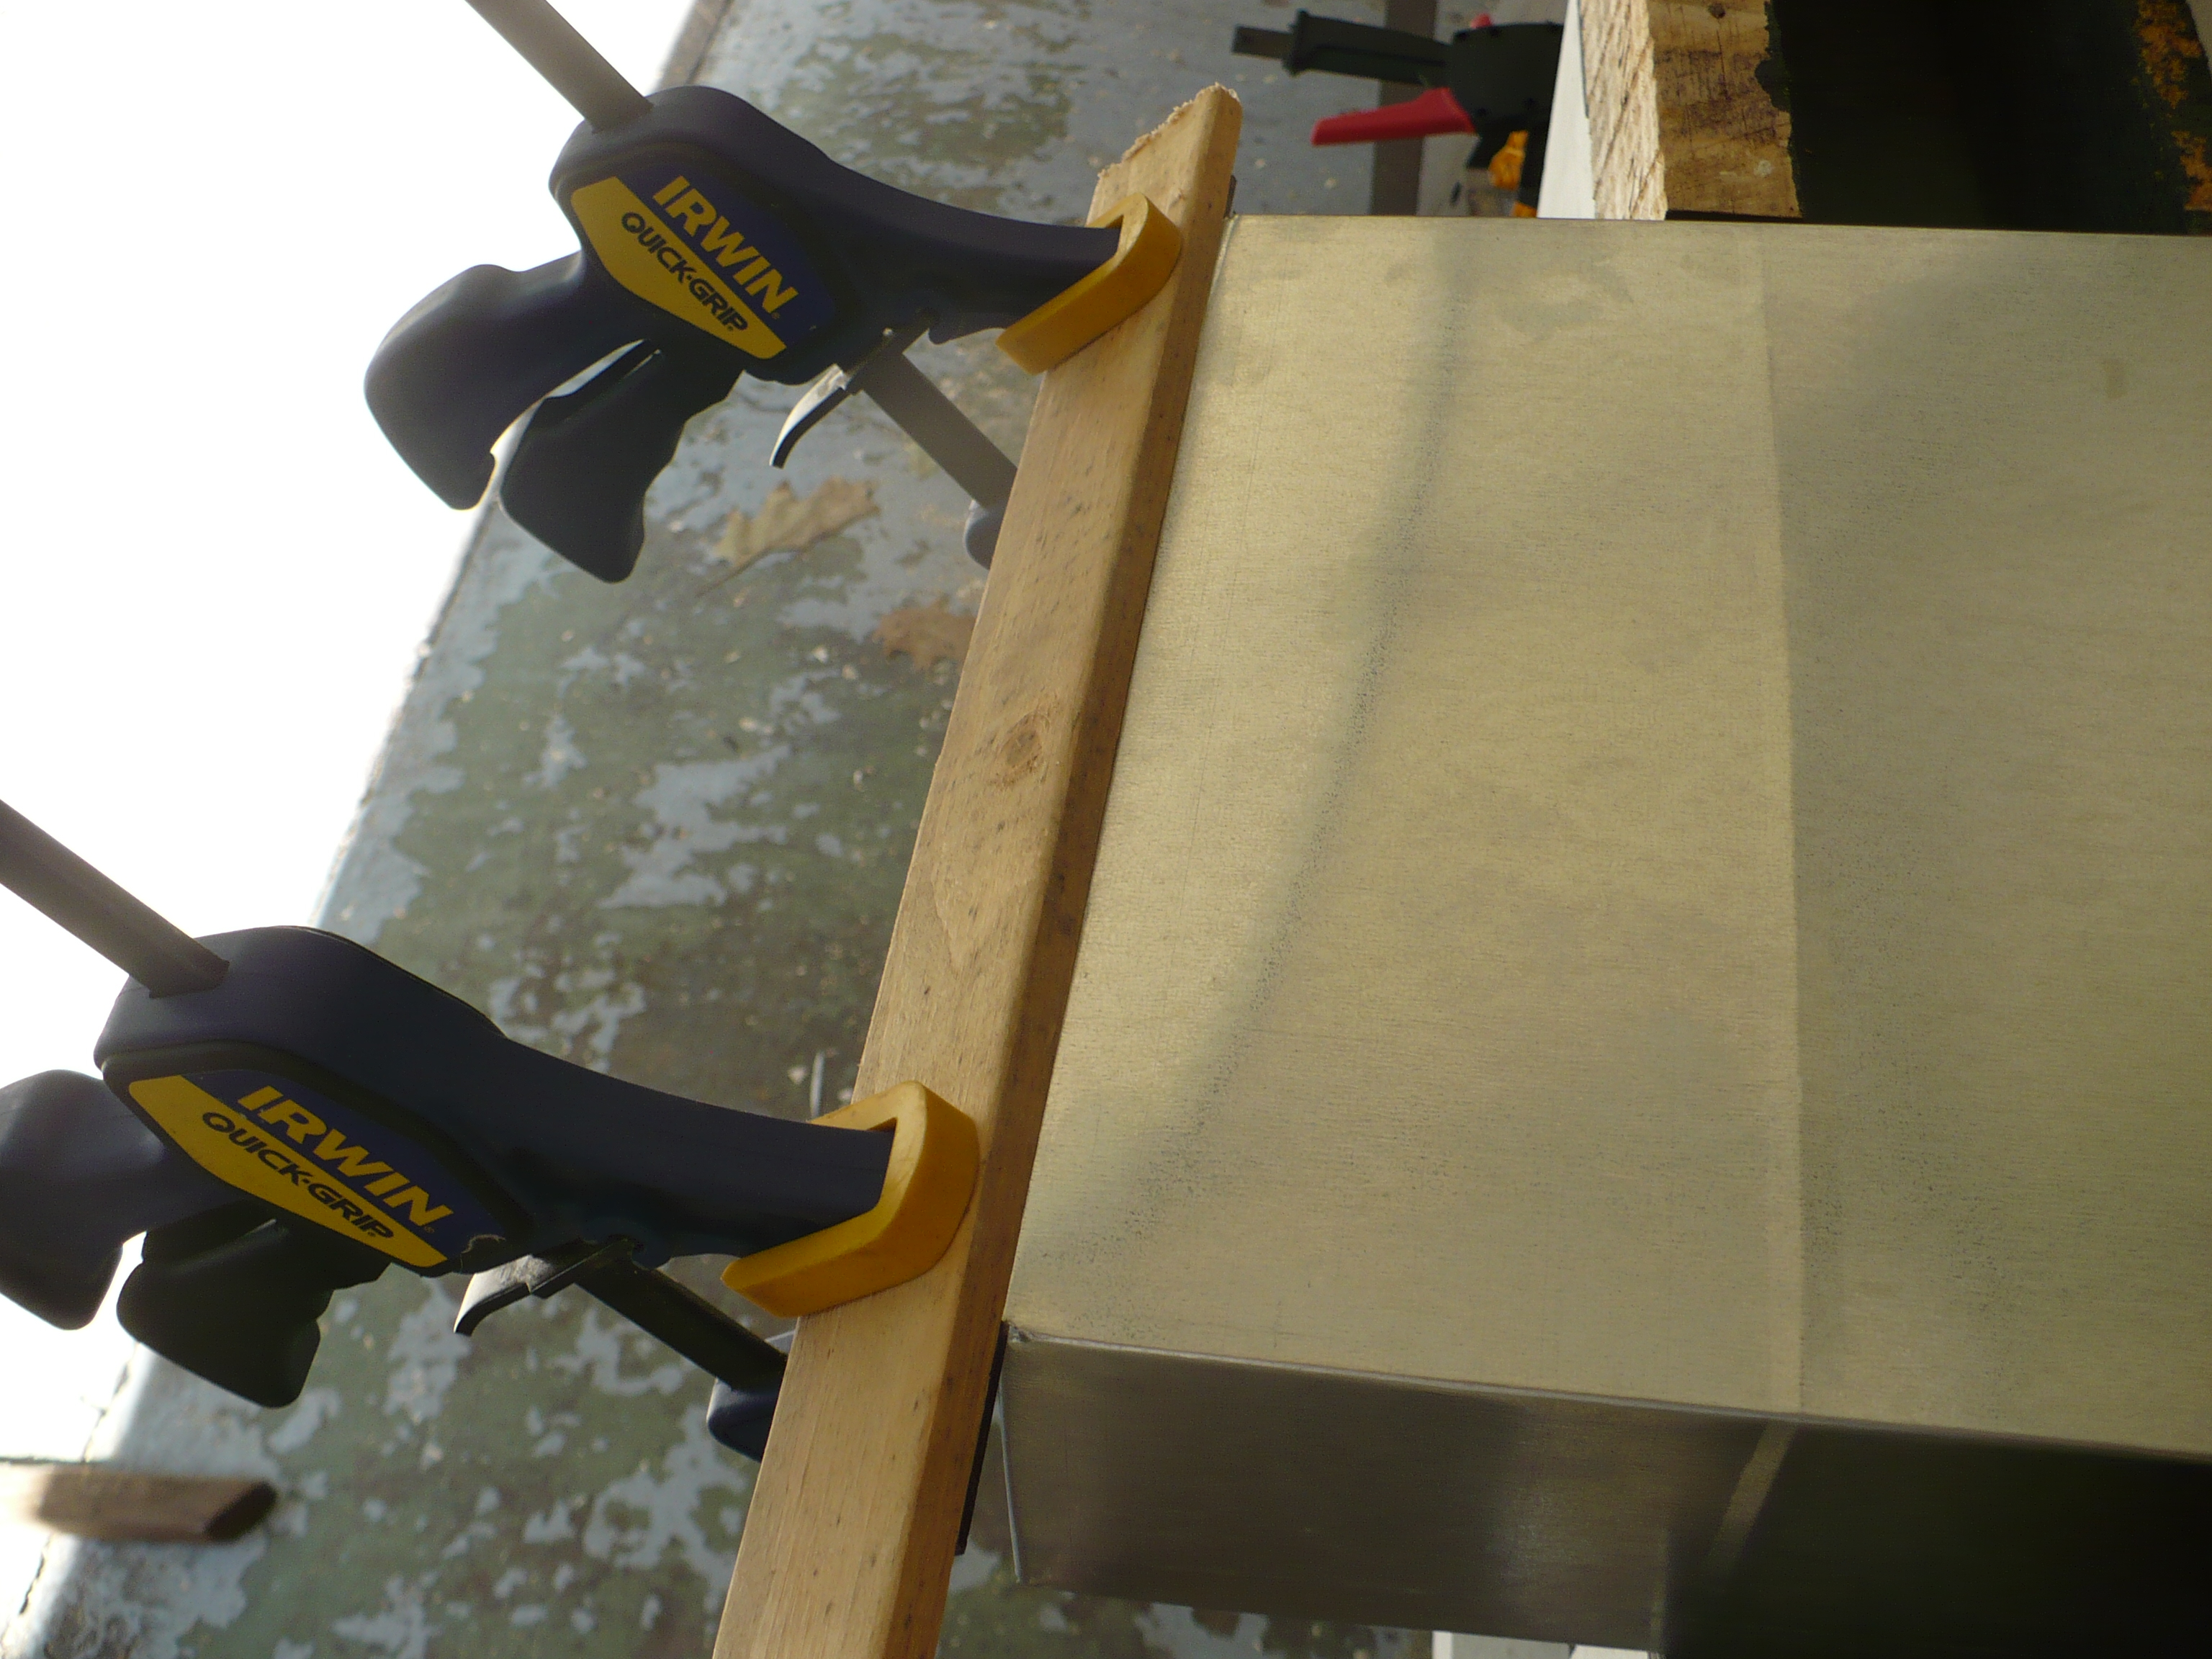
Layout of the top using the labeled pallet ends for decoration – note all the cut nails across the top.Hinges will be hidden – top is ground off to height. I added blocks below the edge of the top so the hinge would be better anchored.Home-made metal break – this will make a clean crease in the metal at the end.
If you choose to use these metal panels, make sure that you center the panels on your top length-wise and cut both the ends off so that the pattern of the metal grid is symmetrical (this one is not quite centered). I used a metal ruler and piece of wood to make a metal bending brake. The clamps hold the ruler and board together and then you bend, making a crisp seam the whole length of the metal.
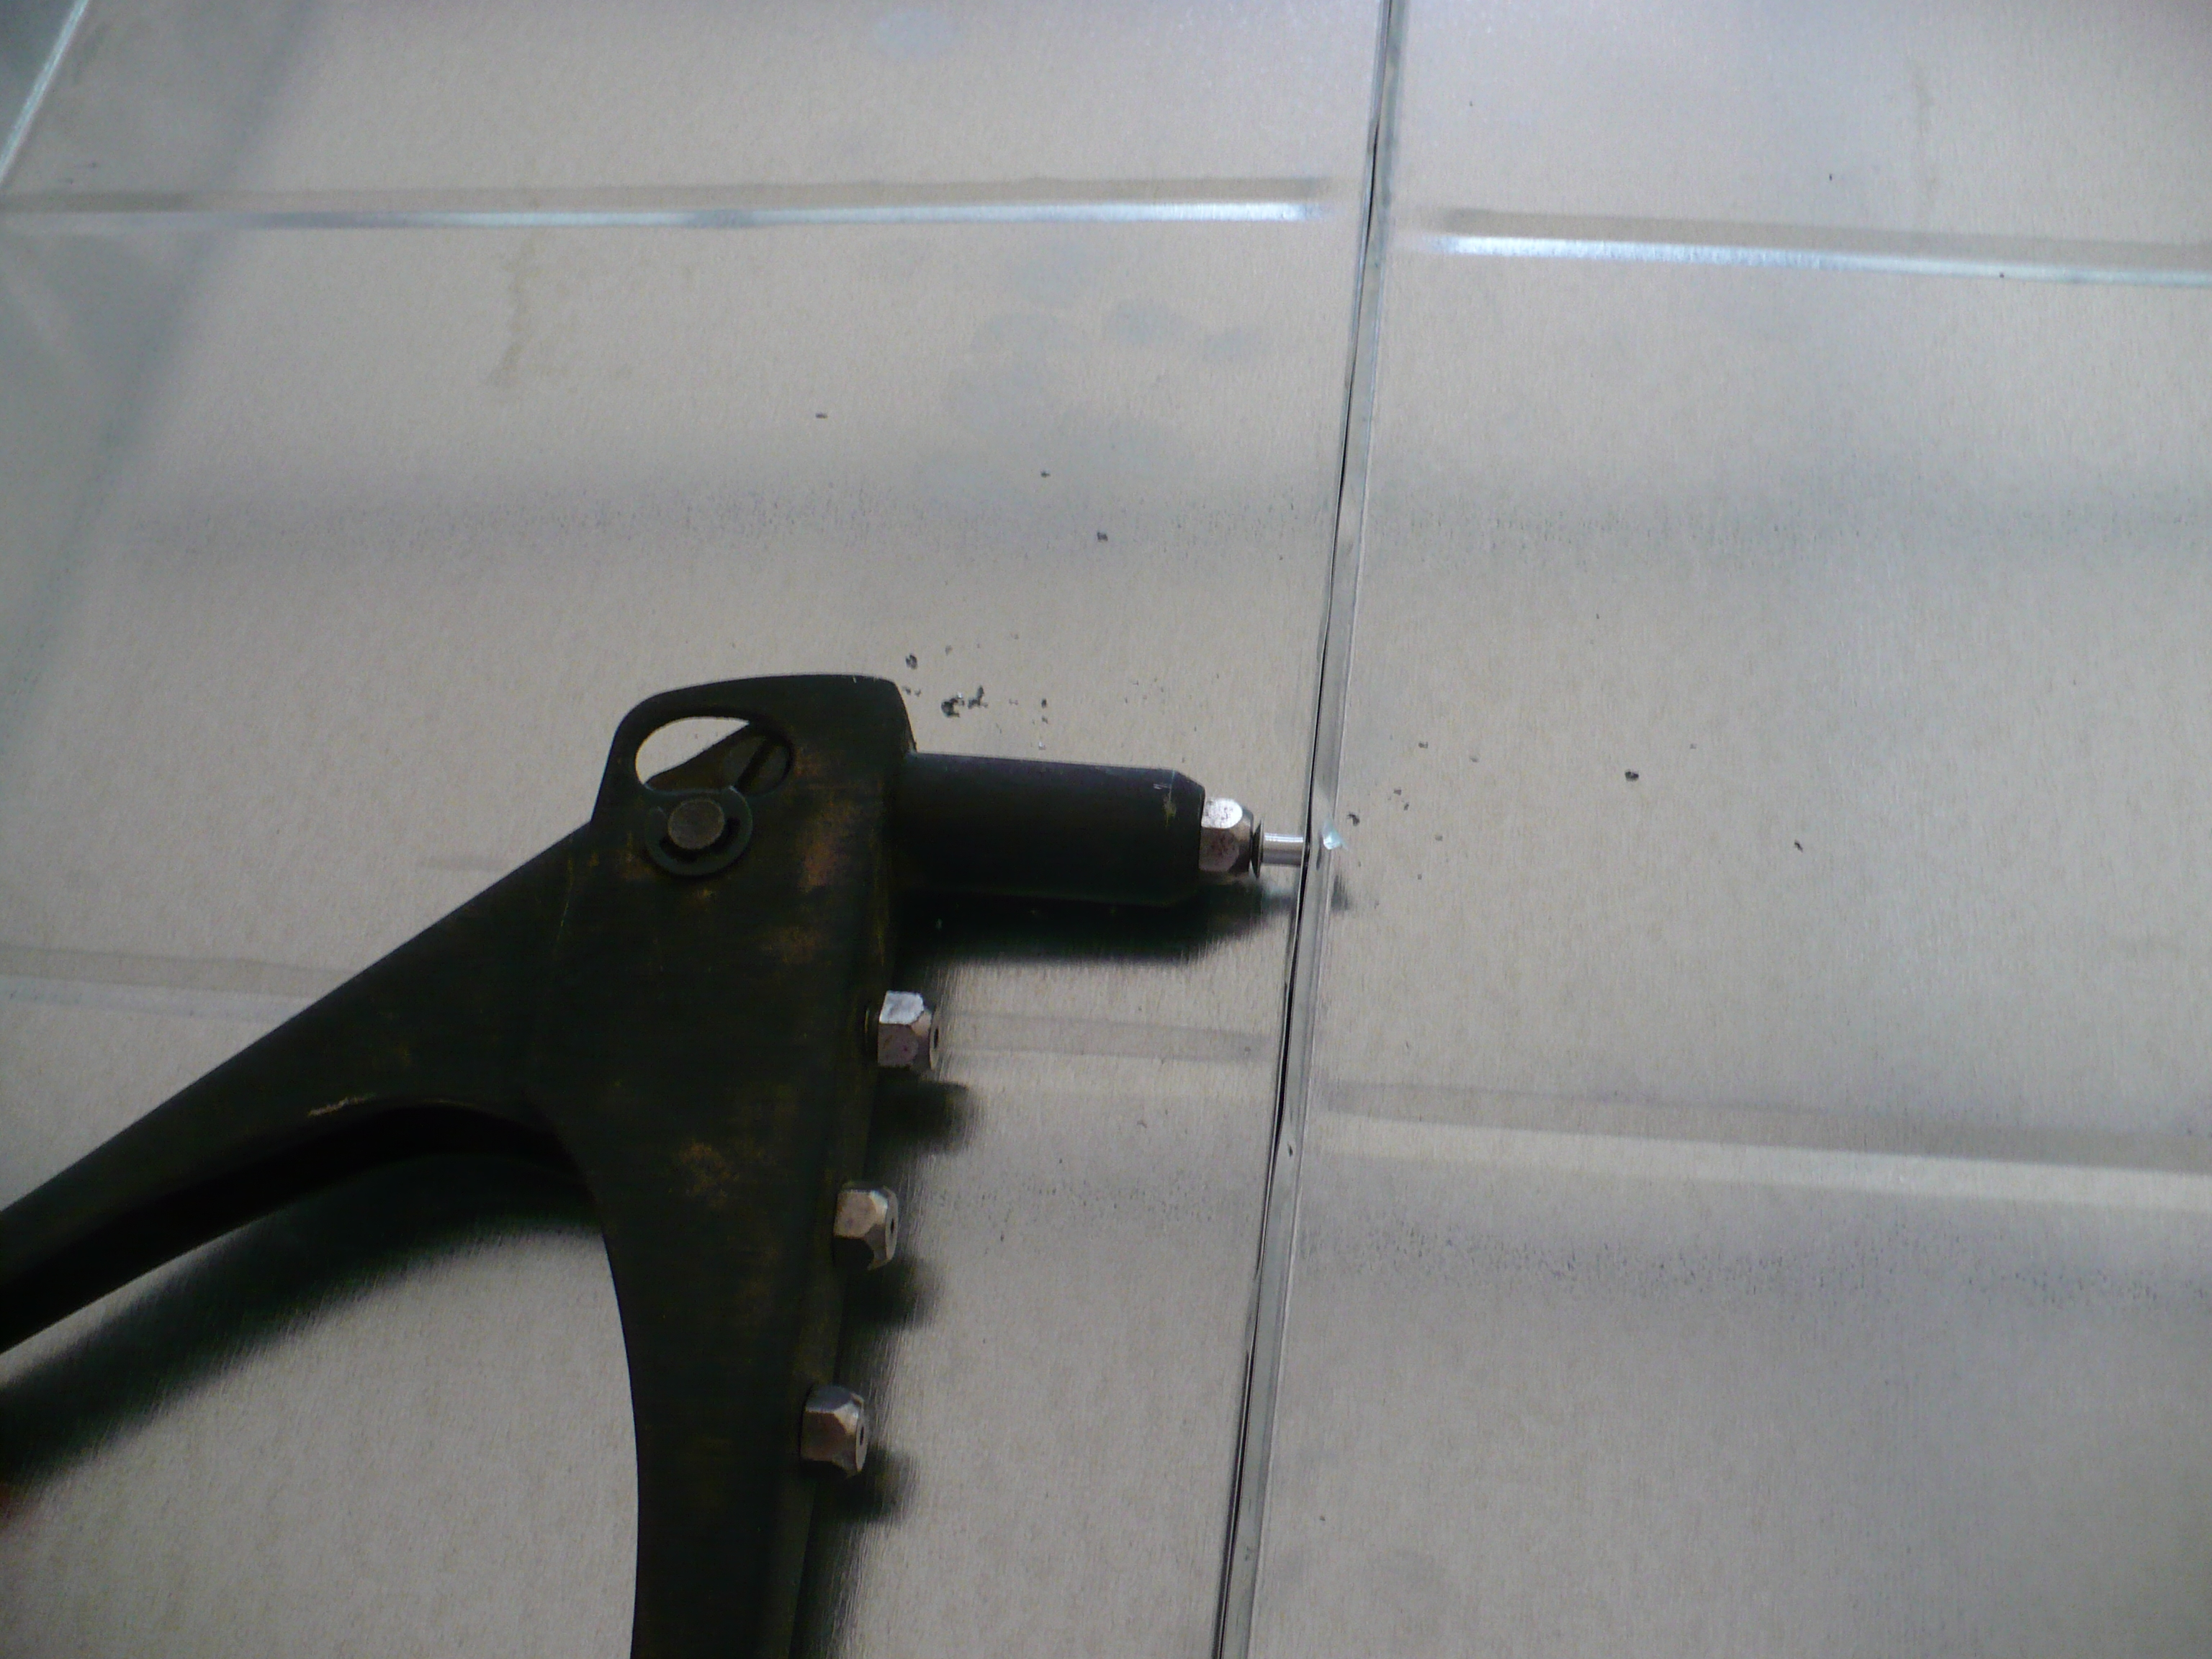
Pop rivets to hold the front and back metal panels together.
I flipped the panels face down and pop-riveted them together and then taped the seam. More photos of the top later.
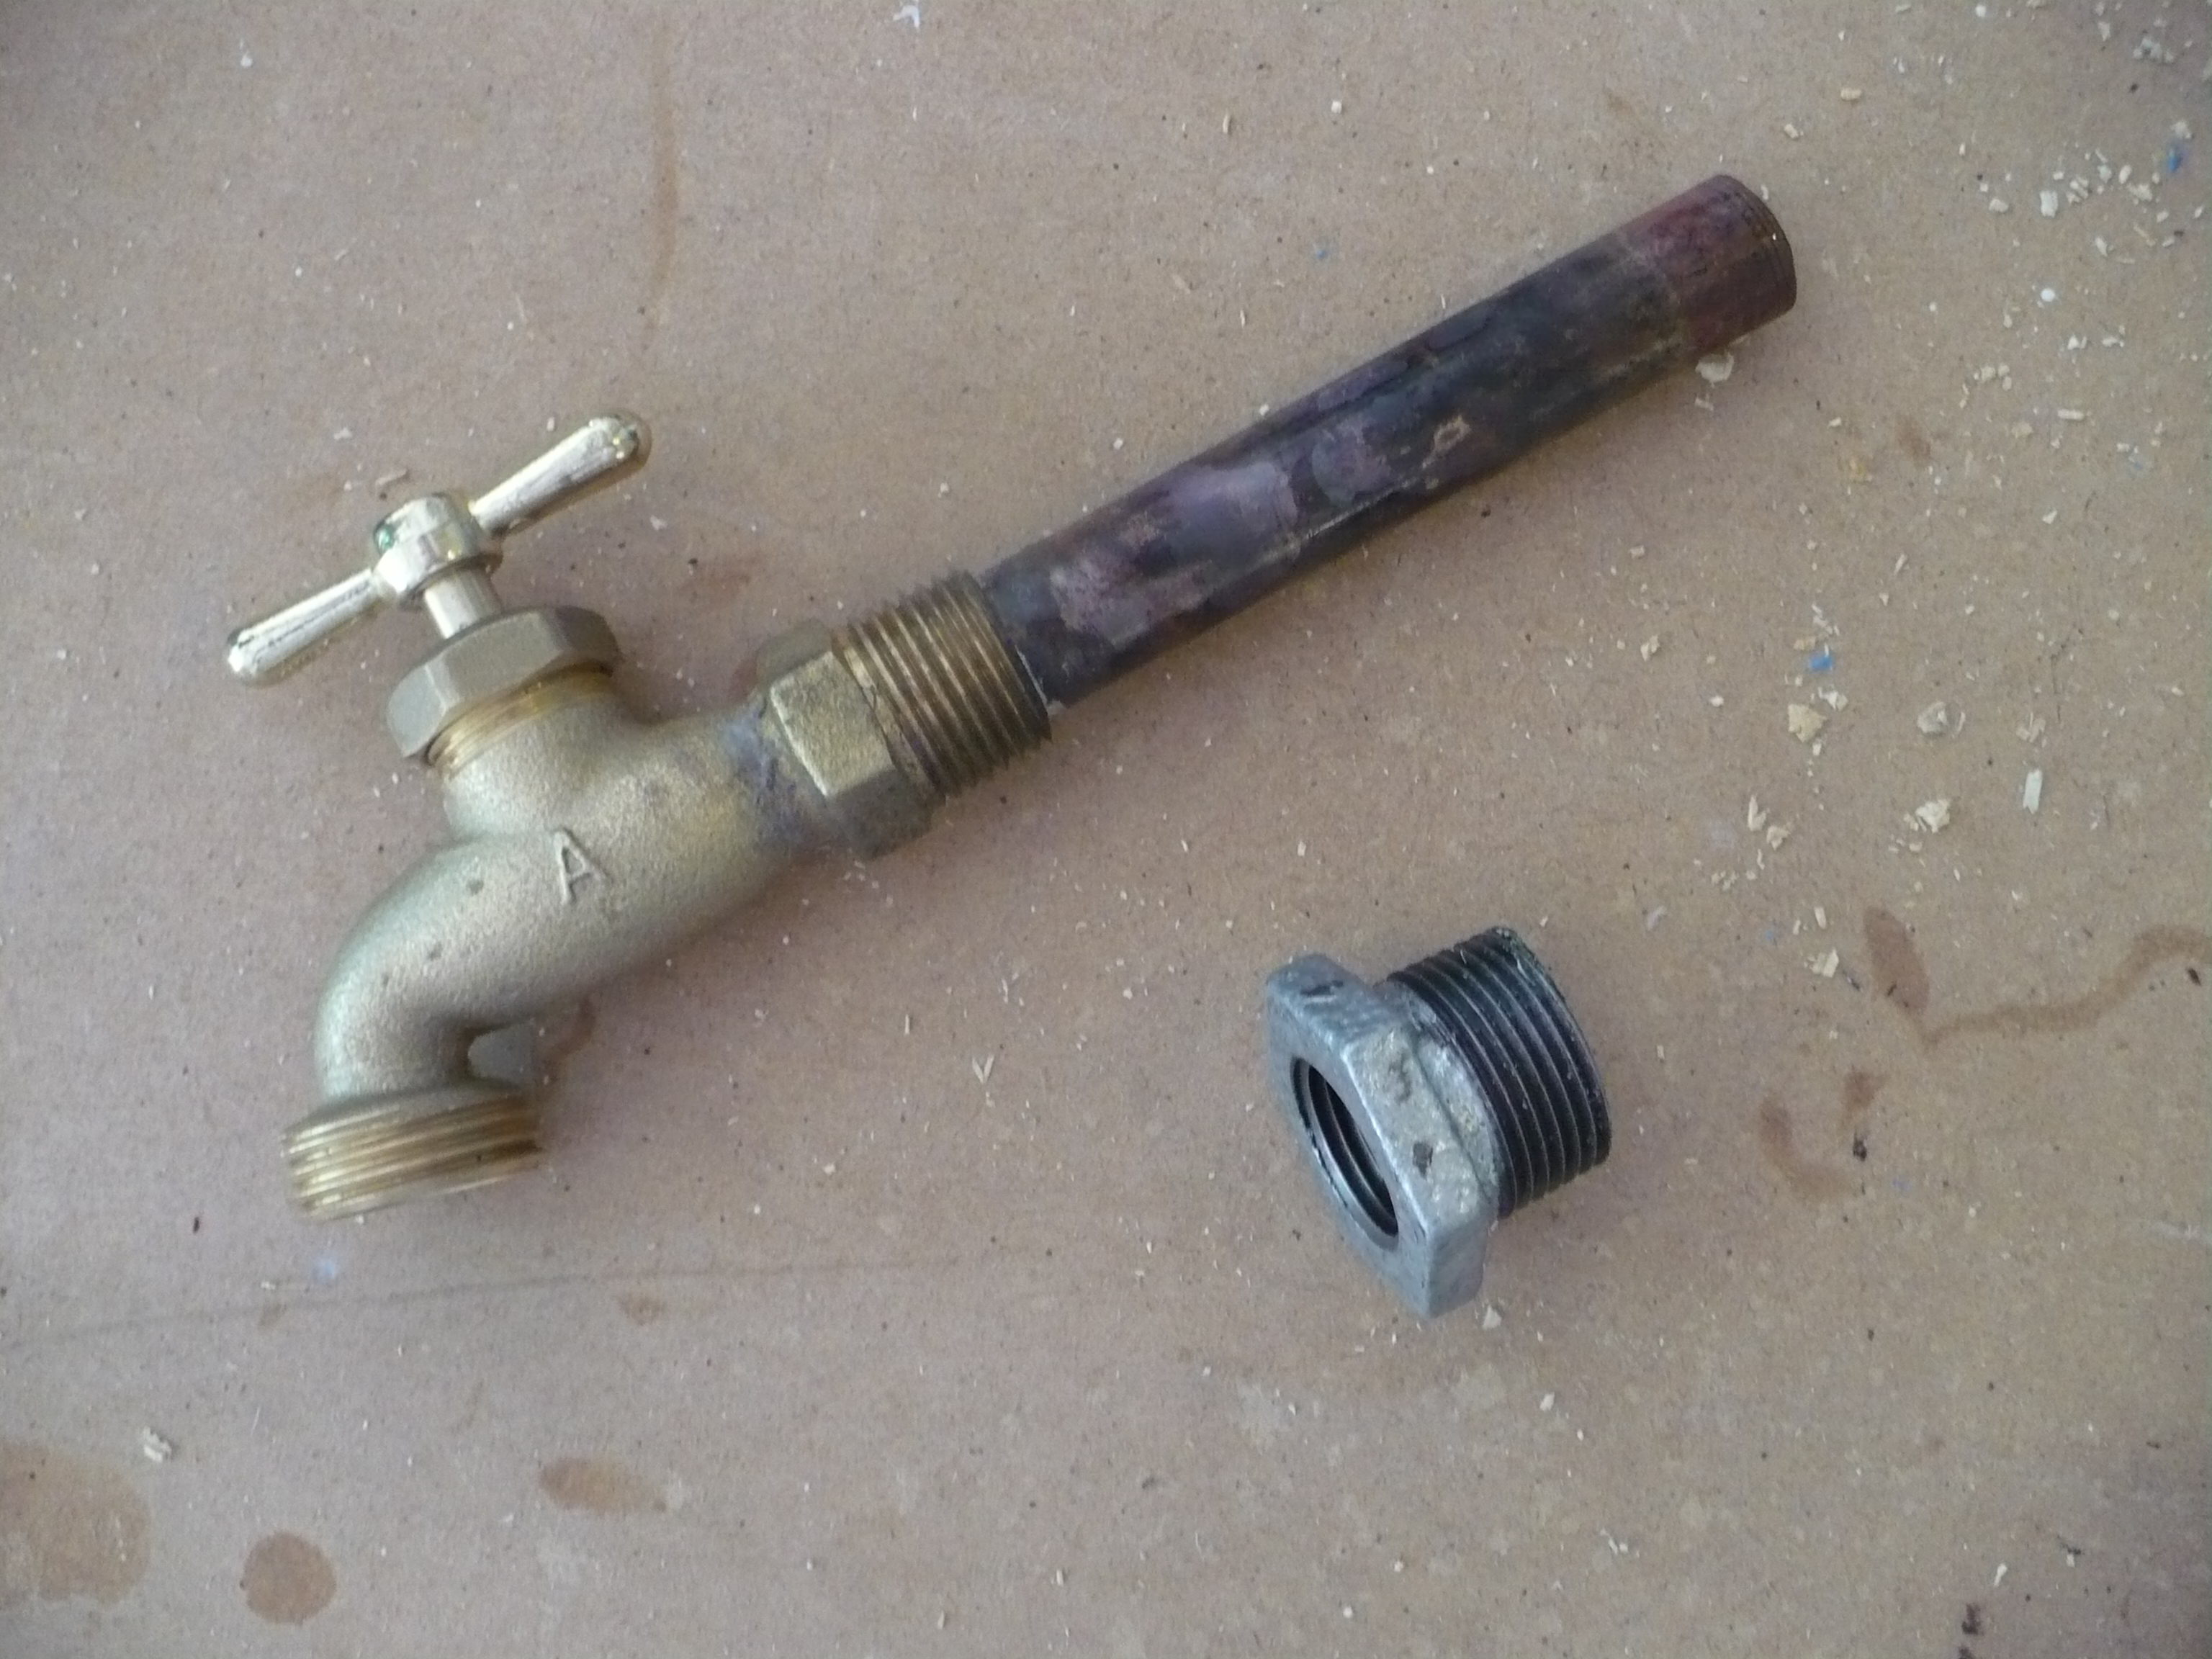
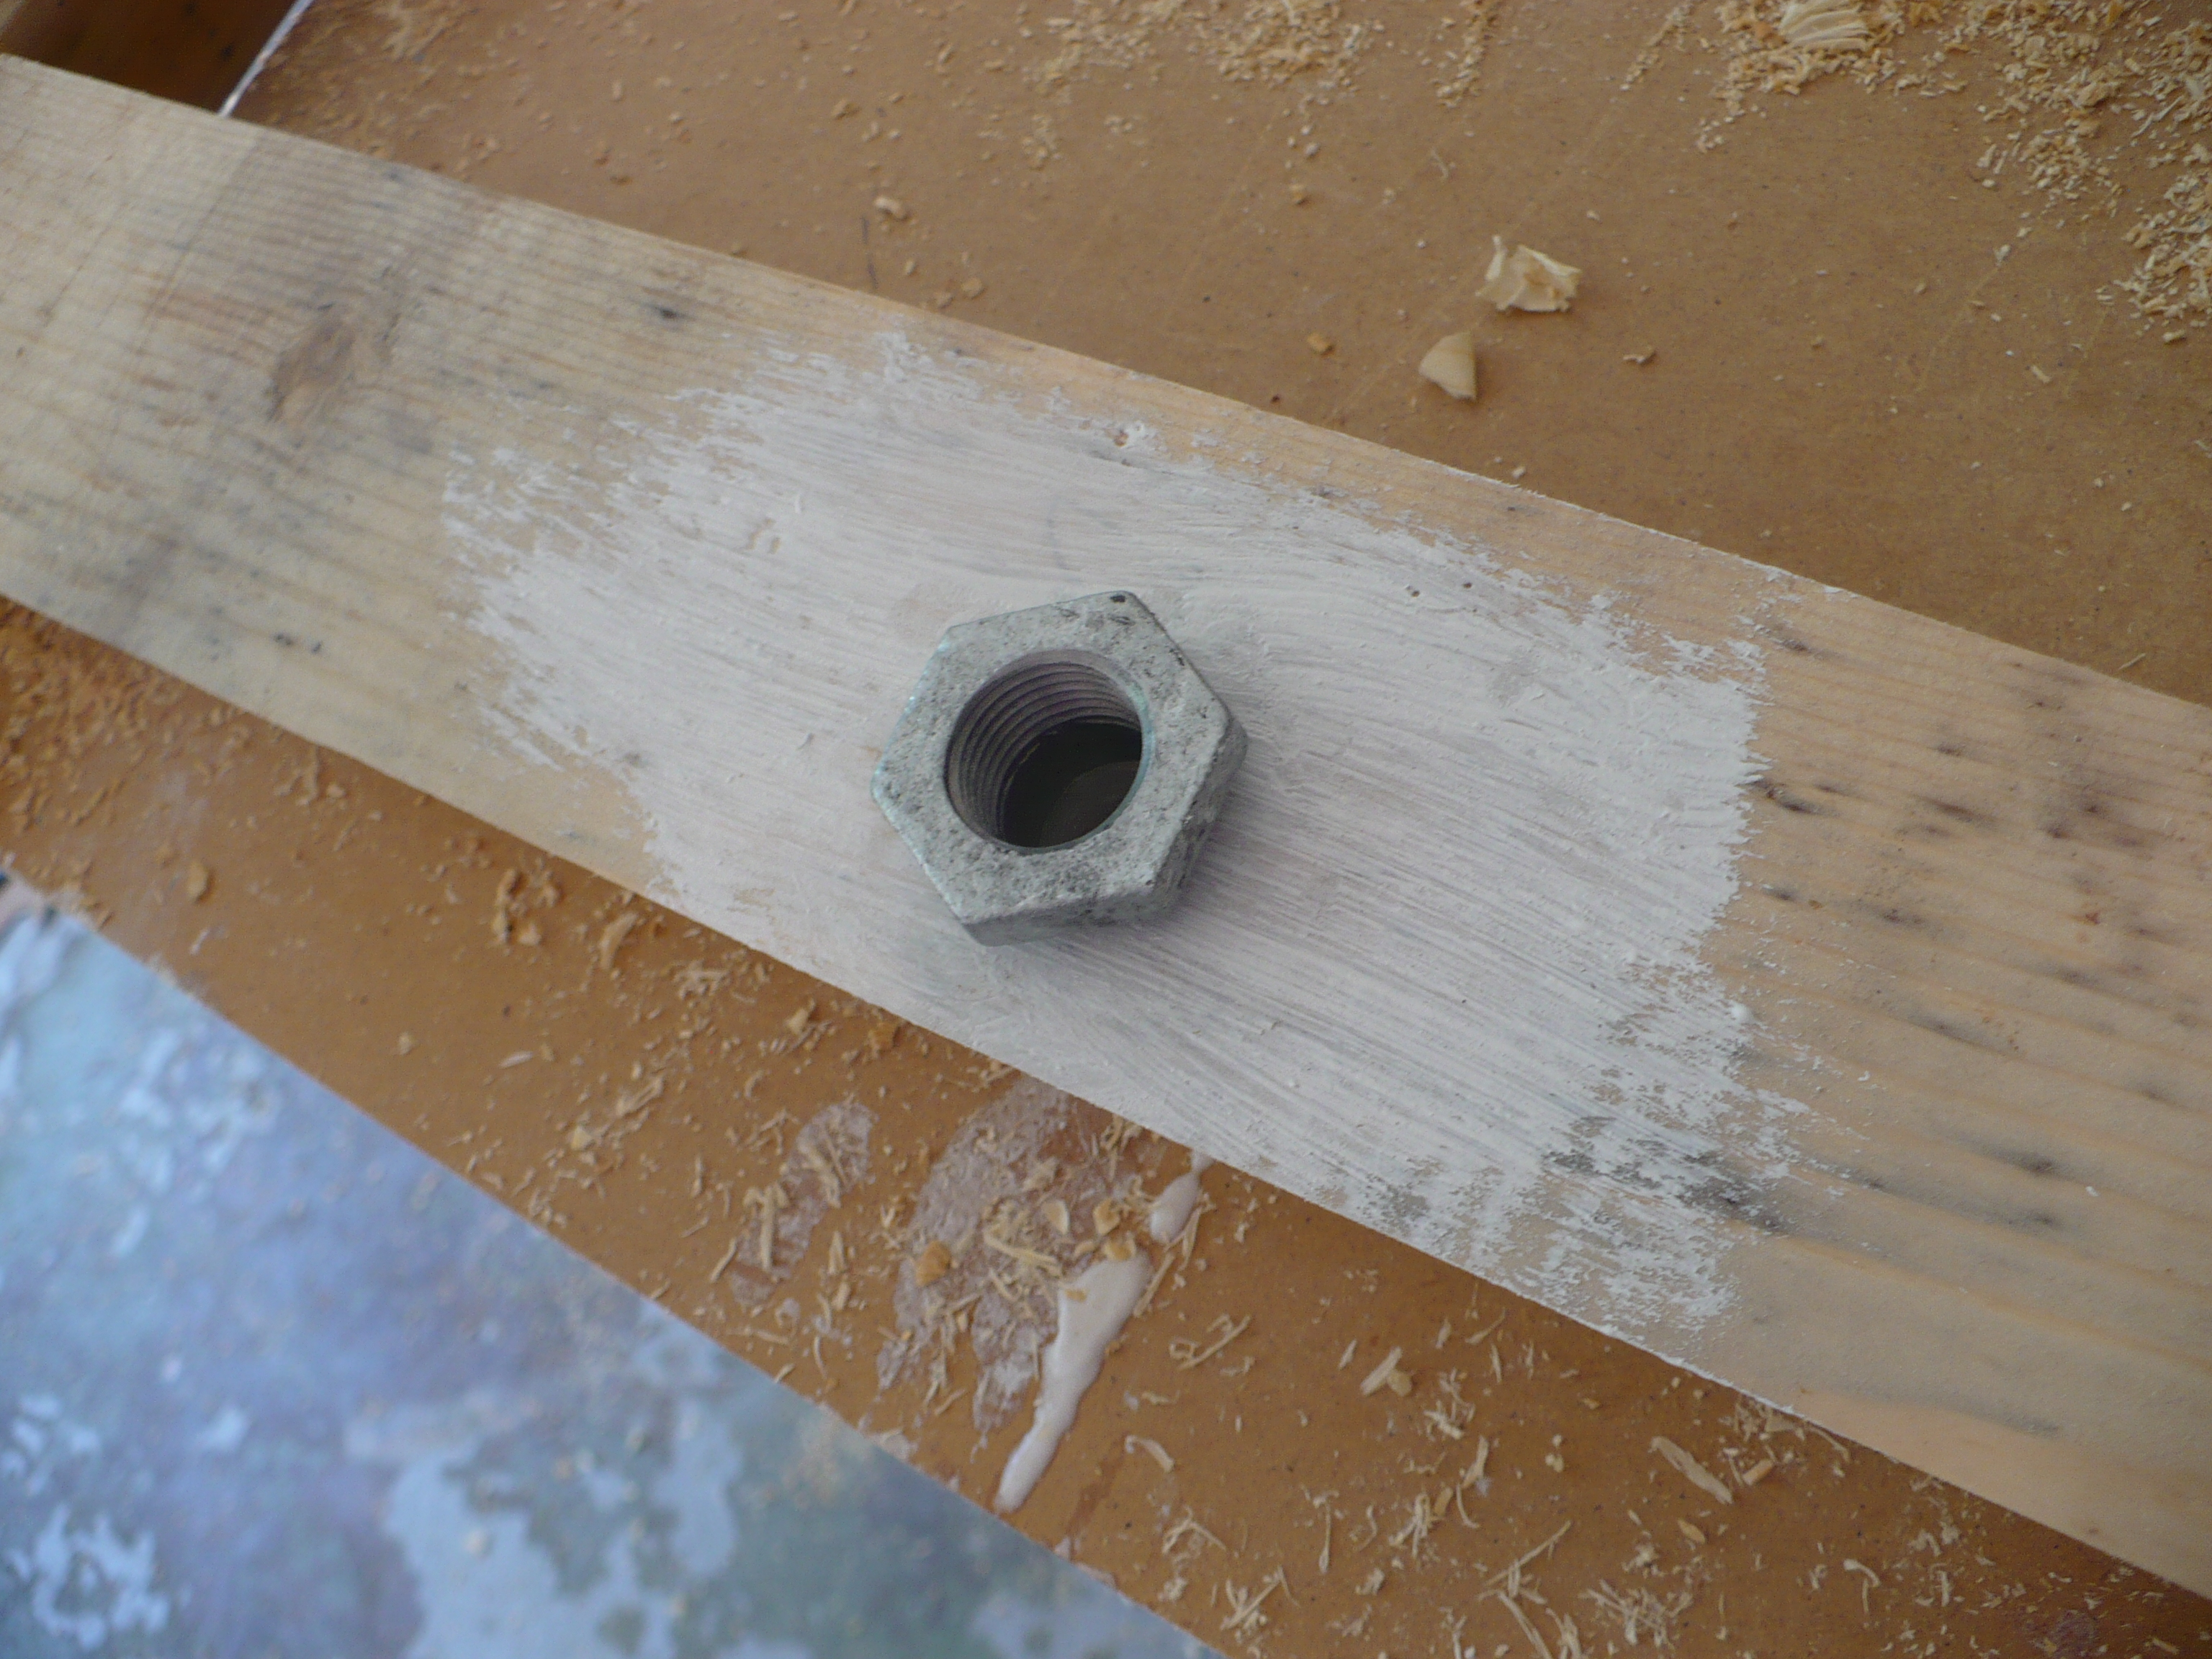
For the drain, I found that a copper pipe would fit into the inside of my spigot so I brazed it in. This extension allows tubing to be clamped on later. I drilled a hole in the frame and threaded the galvanized reducer shown below into the wood, and then threaded the spigot into the reducer’s threads.
Short copper pipe brazed into spigot. Shown with galvanized threaded reducer.Galvanized reducer makes a neat mount for the spigot.
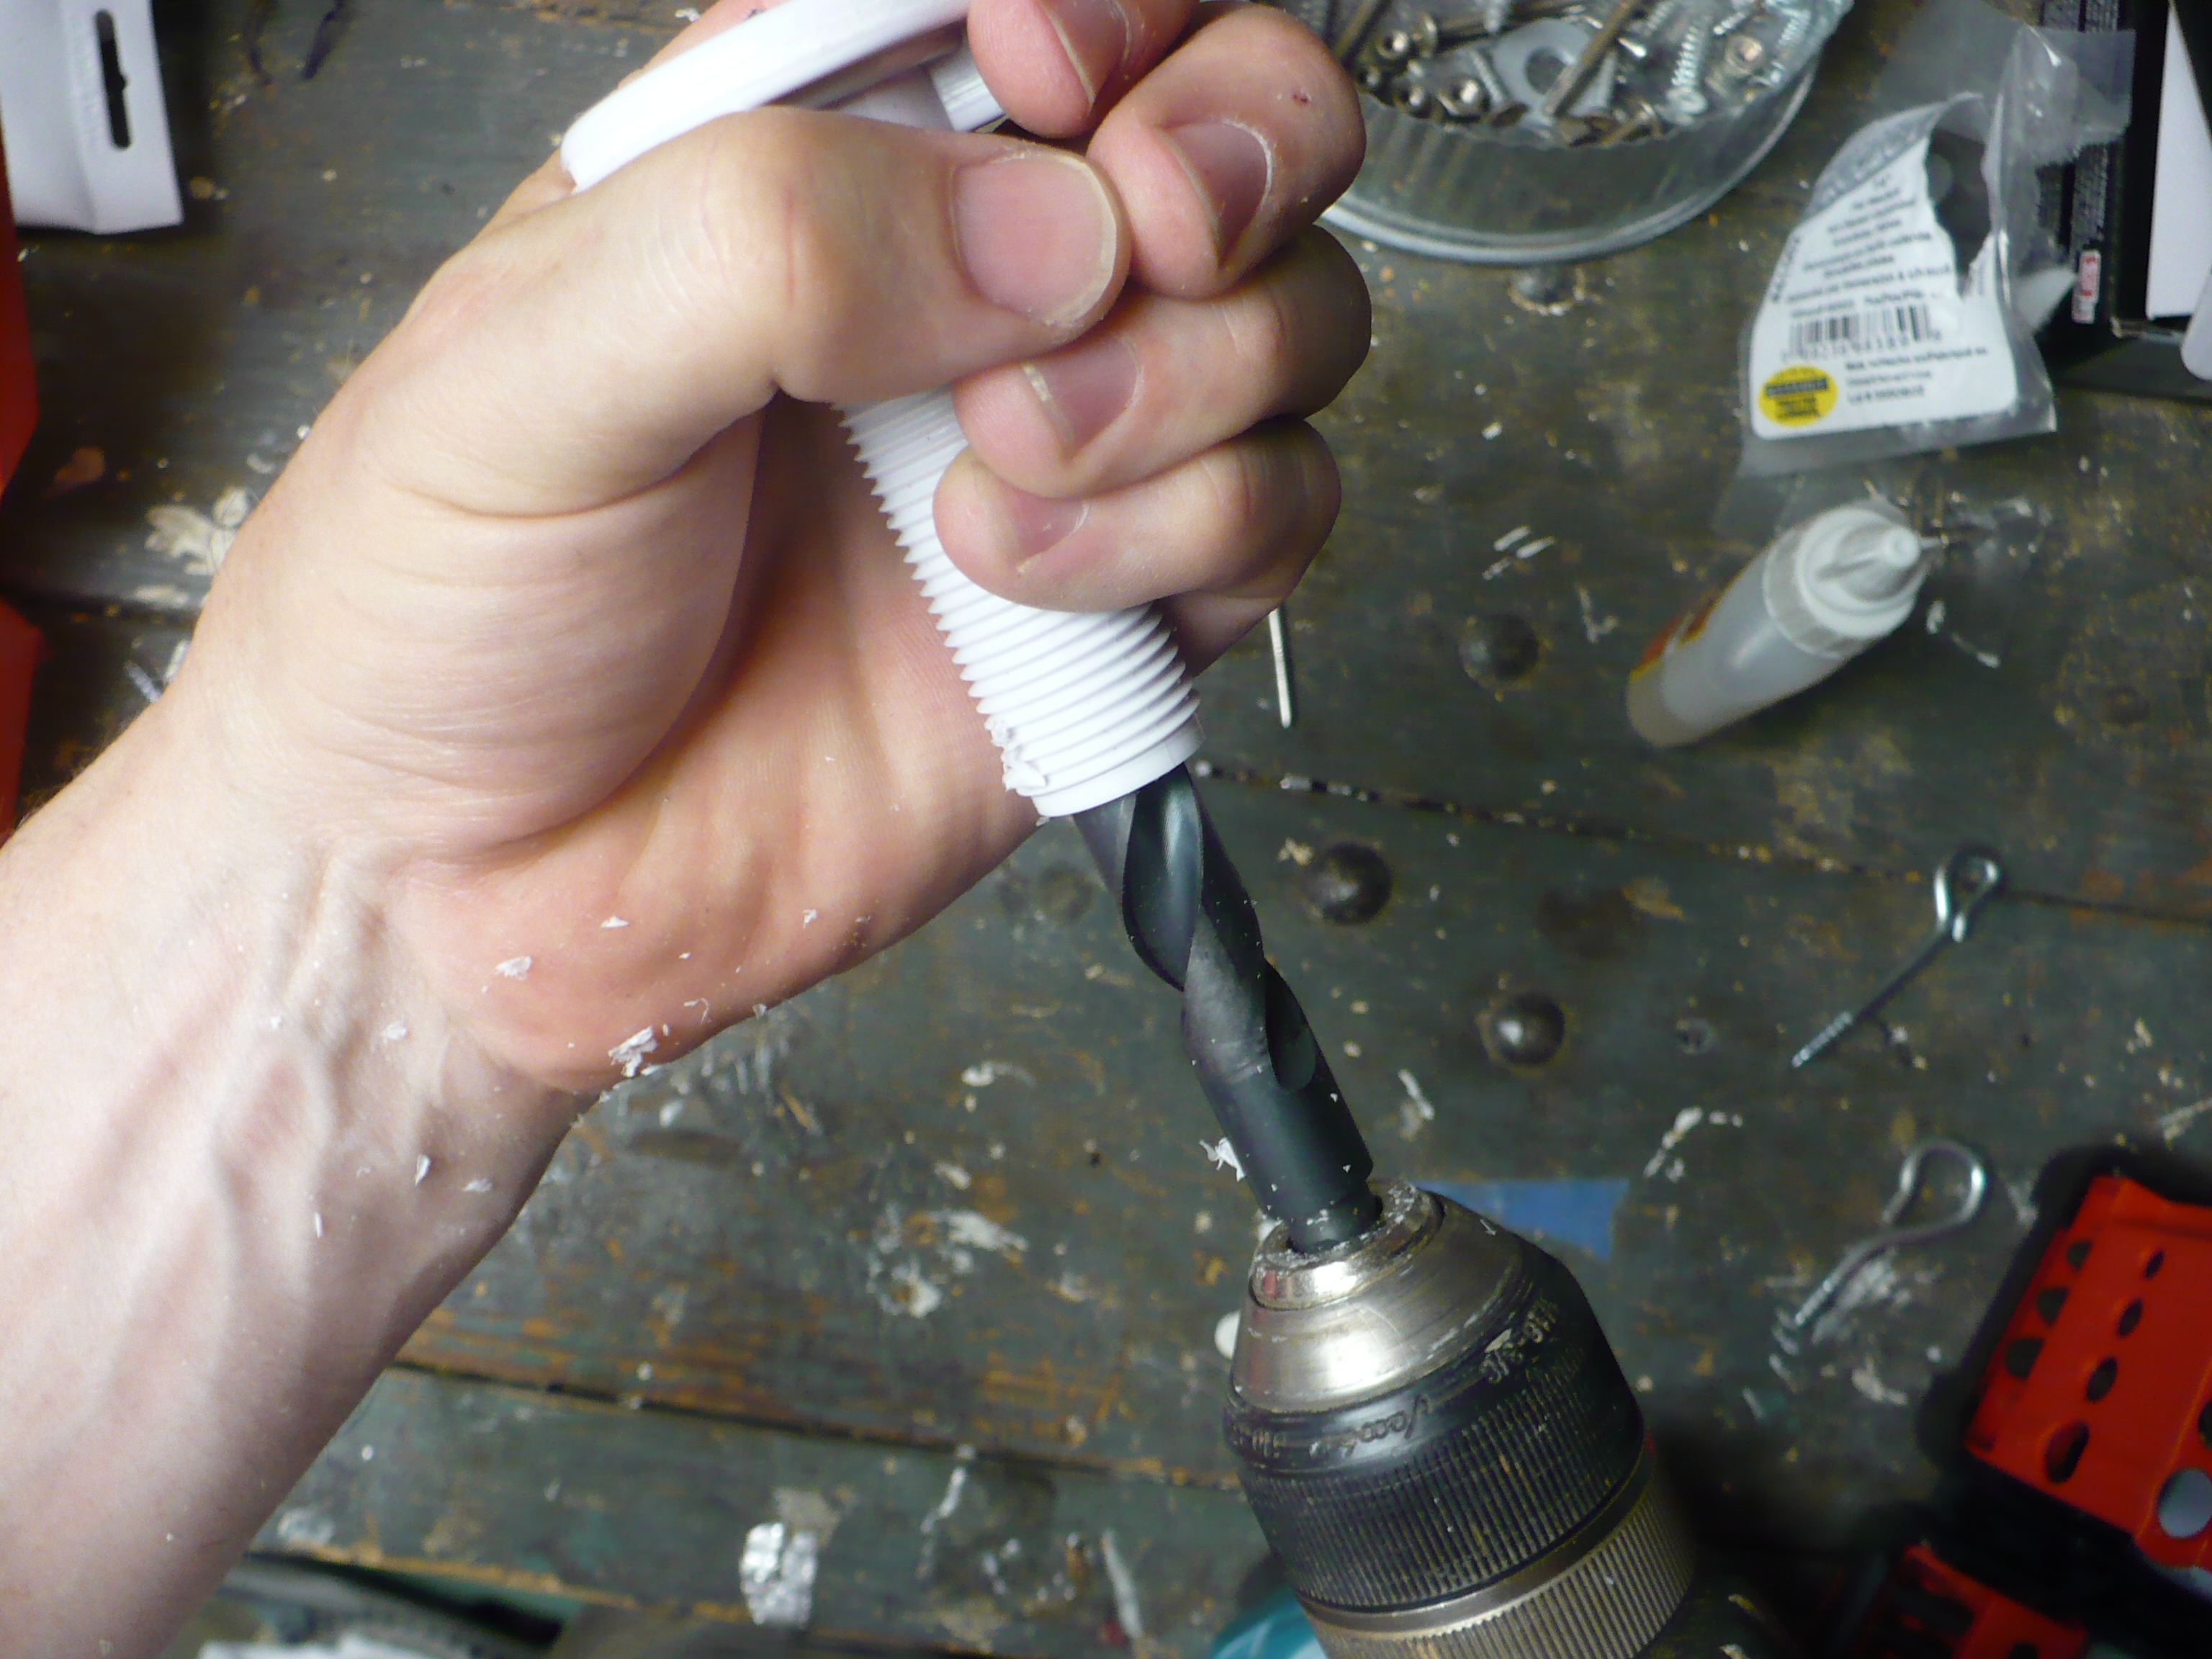
I purchased a cooler without a drain and used the sink hole plug as a nice trim for my drain. A bottom drain allows all the water out without having to tilt the whole stand.
Plastic sink hole plug – drilling out for bottom drain trim.Drilled and beveled the hole for a clean look.
Some tubing and a couple of pipe clamps and the drain is in place.
Spigot connected through the bottom brace – Lots of room for the bottom nut on the sink hole plug.
I neglected to photograph the front and back panel installation because it was so quick. Again in the HVAC section, there are flat metal sheets in various sizes. I cut them to size and screwed them to the inside of the front and back frames. As you can see here, I covered them on the inside with some scrap plywood to back them.
To hold the cooler, I pushed it up into place and nailed in some cleats attached to a cross member to hold the weight of the cooler. I pre-drilled the support so the drain would pass through. I flipped the cooler and covered the pallet ends with aluminium foil on the inside so that the foam would not expand between the boards and show. If you dispense Great Stuff slowly it expands a great deal more.
Three cans of “Great Stuff”. I like having more insulation and a tight fit. Note aluminium foil against end panels.
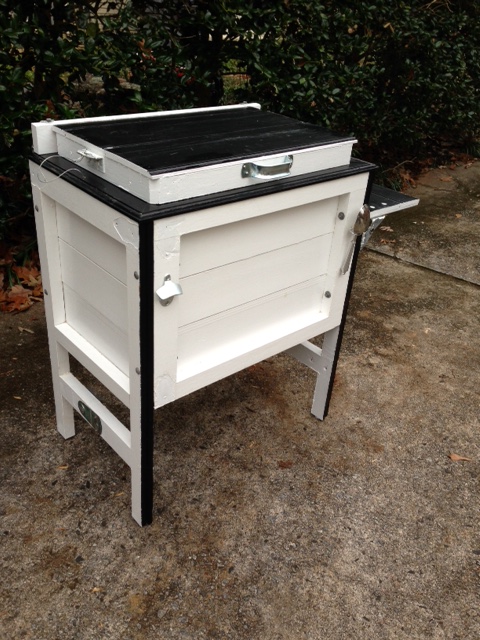
The cooler is now foamed into place, Time for exterior paint, wheels, a shelf, and other odds and ends.
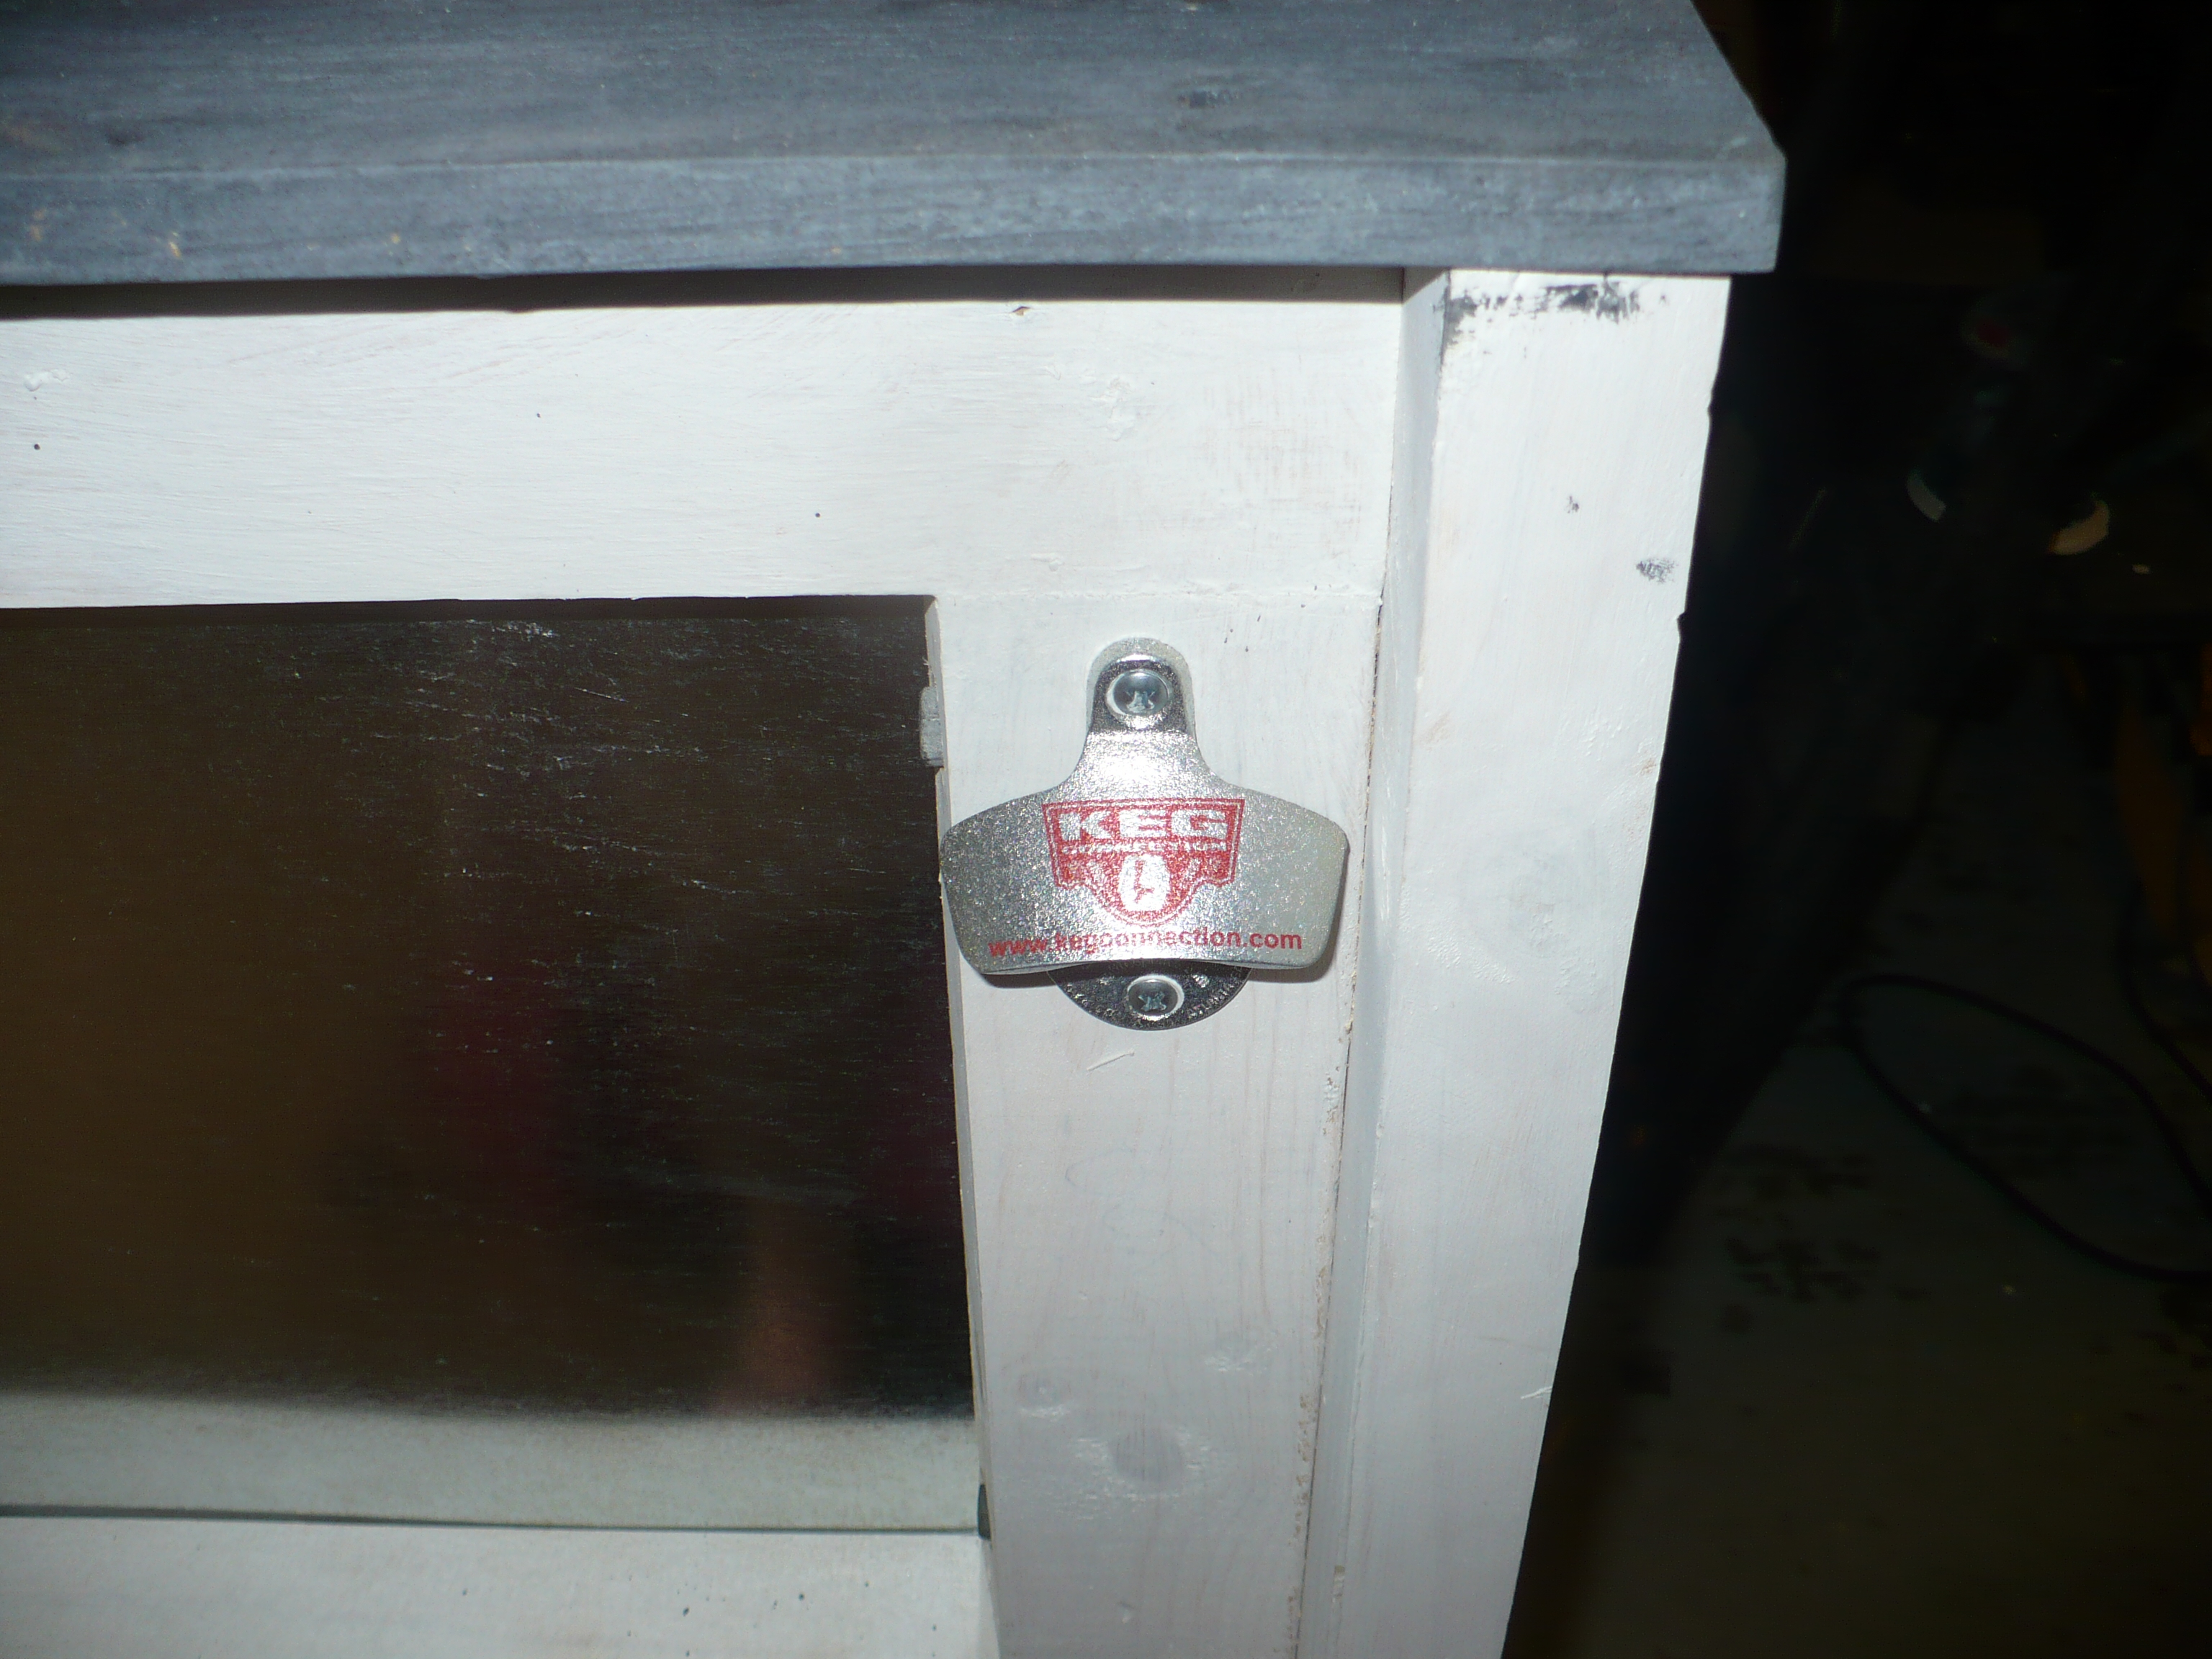
Ebay – bottle openerHinged lid will stand open – but I added a swaged on bicycle brake cable for reinforcement.Detail of the lid structure – I closed the cooler. then closed the wood hinged lid and drove 4 screws through the frame into the side of the lid to hold it in place. I did all of this before adding a layer of metallic insulation and putting metal panels on the top.
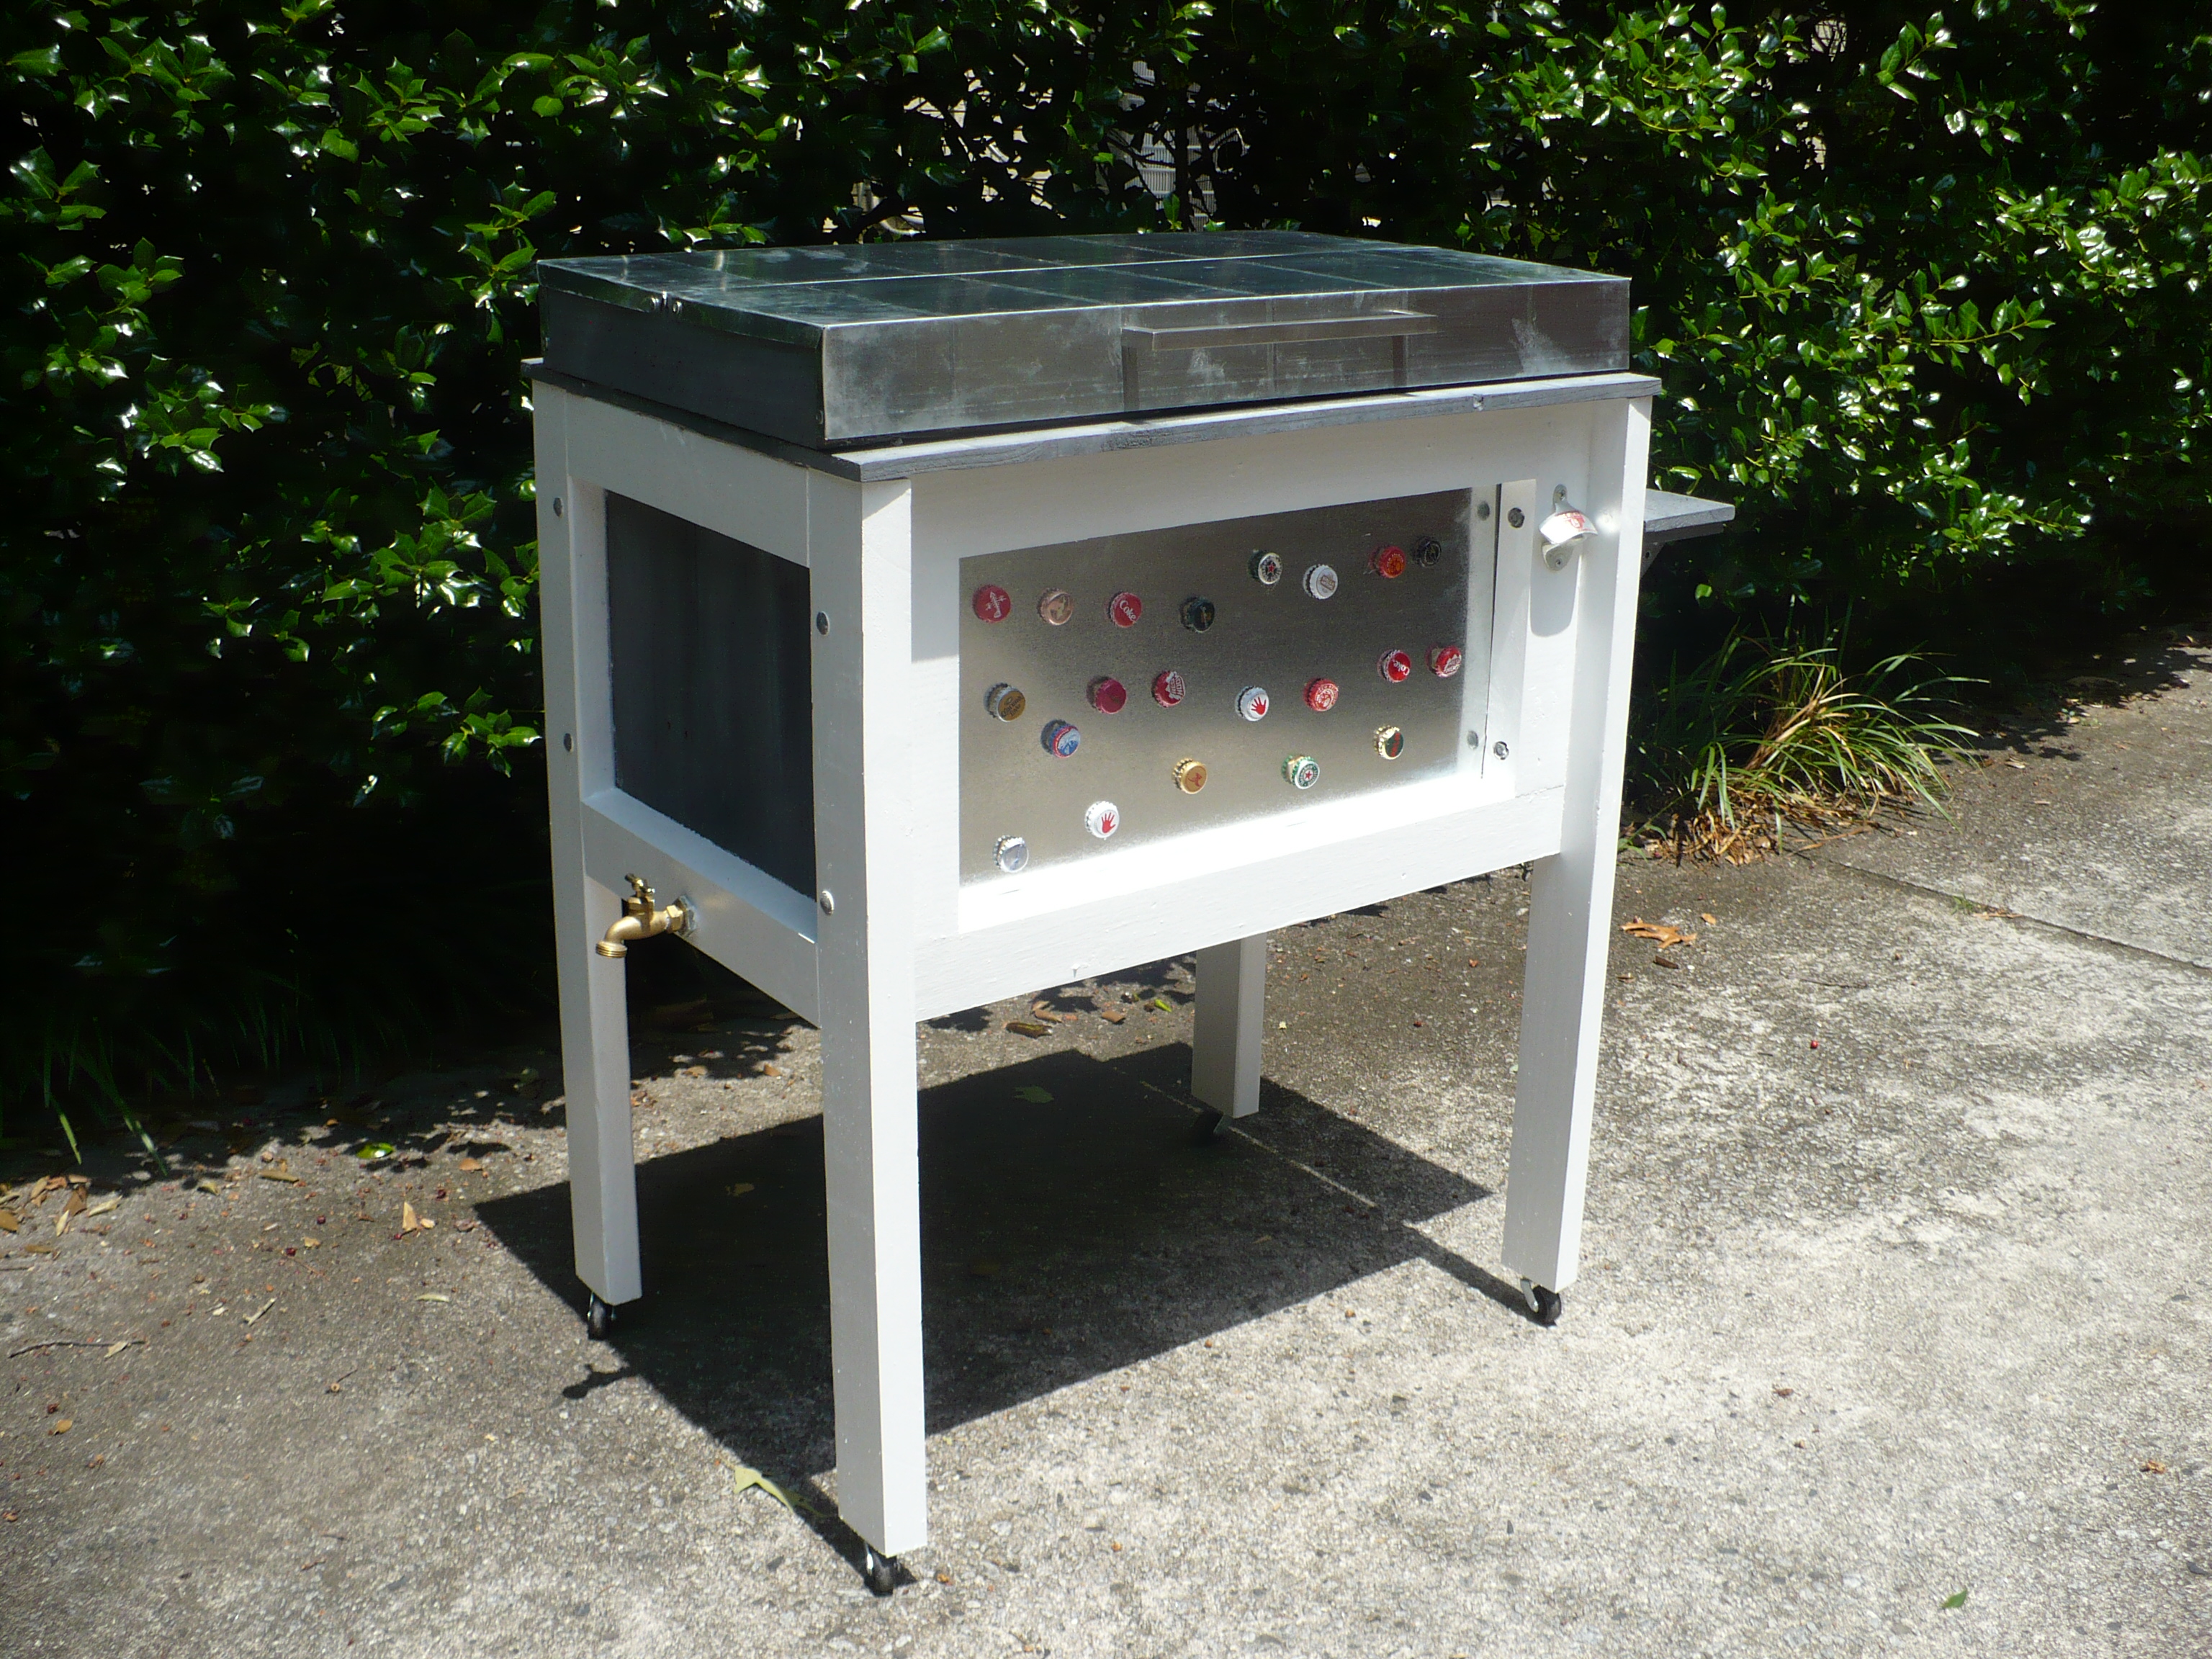
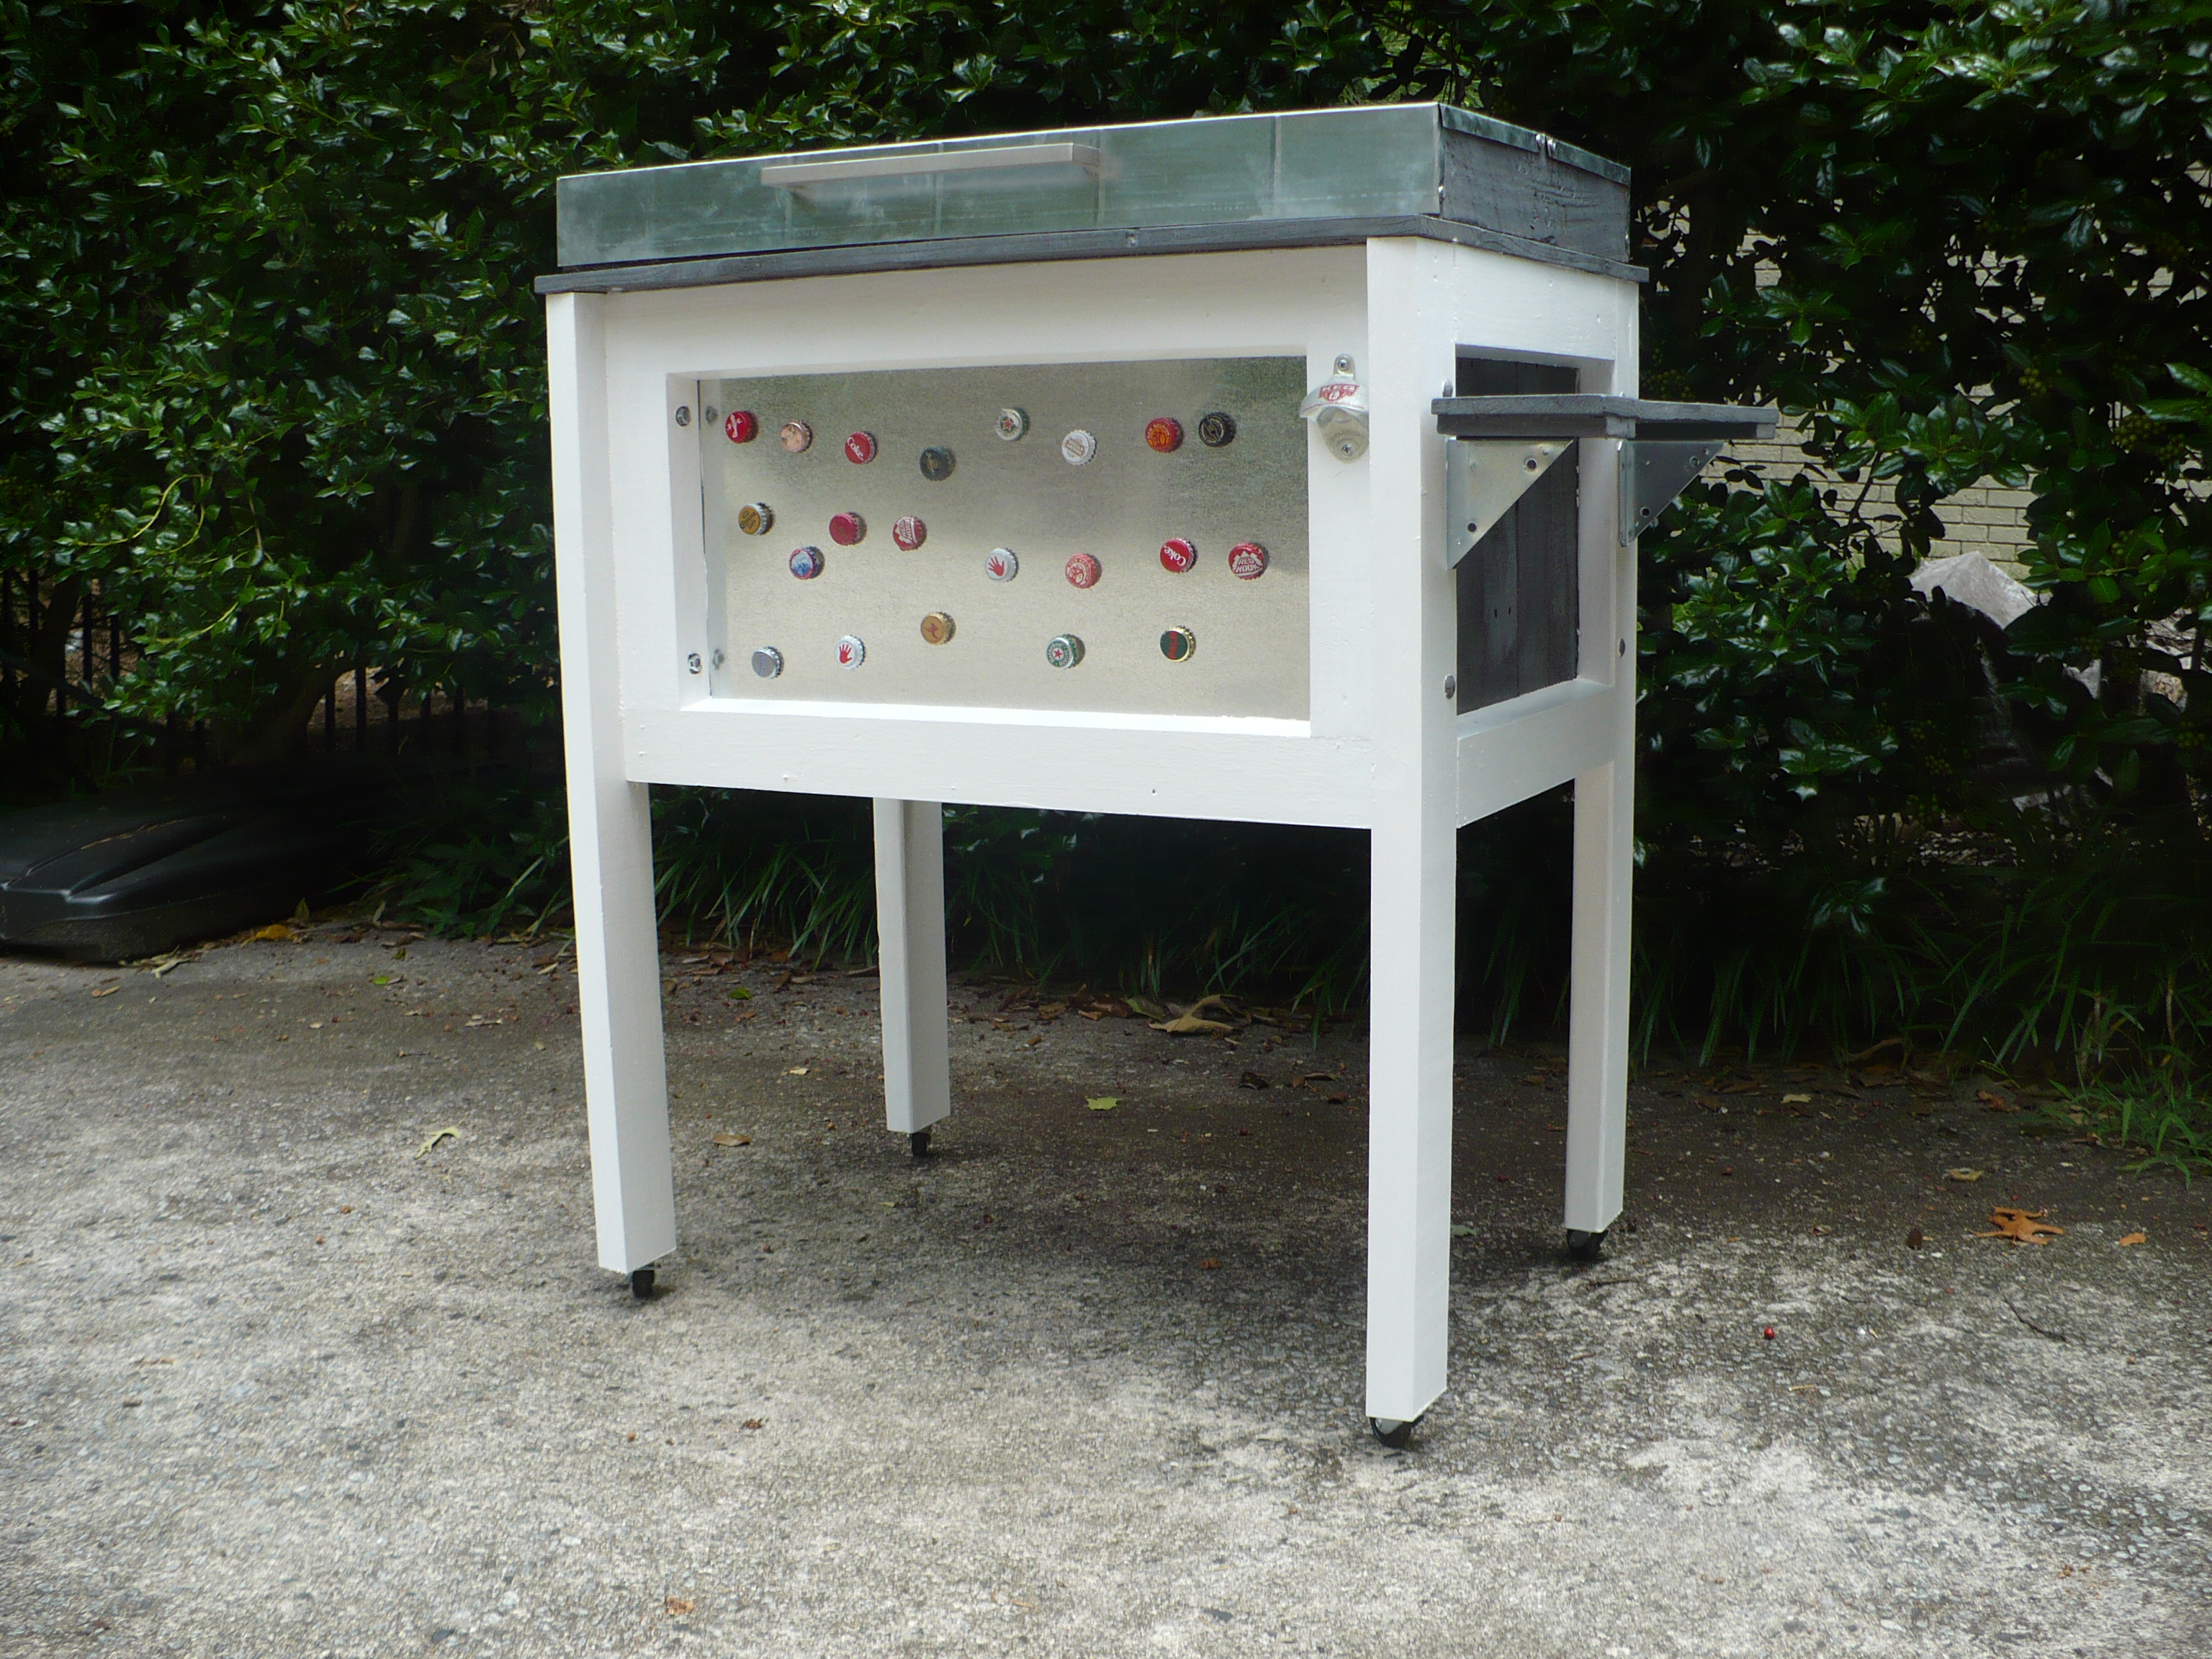
The front and back metal panels are magnetic so some decorative magnets only made sense. Hot glue and bottle caps.
Wheels added, kitchen cabinet handle added to the lid, and a shelf screwed onto the right side.
This shot shows the detail of the two metal panels joined along the center, A couple of screws on the ends hold the entire top metal onto the wood frame structure.Spigot end – I used a couple different shades of grey to get the distressed wood look.A small shelf to hold your bottle while you open one for a friend.Bevels in the metal of the lid give a grid look. The weather will age the metal in short order.
No ice in it yet, but it is certainly beer time.
All told this project took about 2 days of construction work including painting. I learned a number of tricks that will come in handy in future cooler building or other projects. I hope my sister enjoys this cooler. Try building one yourself – it is very gratifying to pull that lid back reach into an icy bath of bottles and pry the lid off with the built-in opener (even if it is a twist off!) Good luck.
Stay tuned – subscribe to this channel for different project ideas.
I completed a project that turned our pretty well. I thought I would share the details as a blog and maybe stir up other’s creativity. I will look to add additional projects that I complete. This was done as a gift, not a business venture – enjoy the details and let me know if I should capture other of my “up-configured” projects.
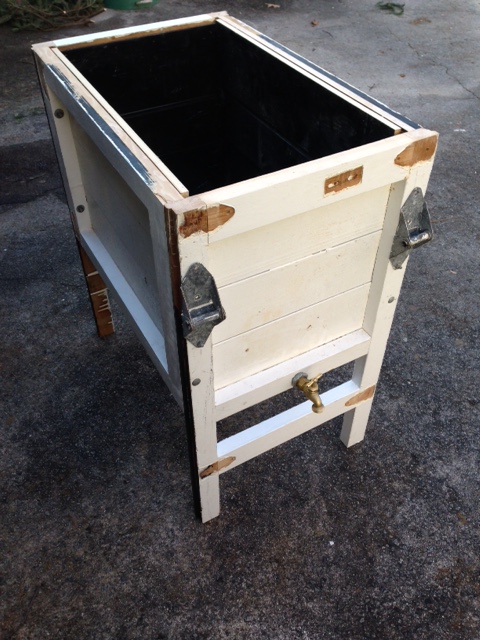
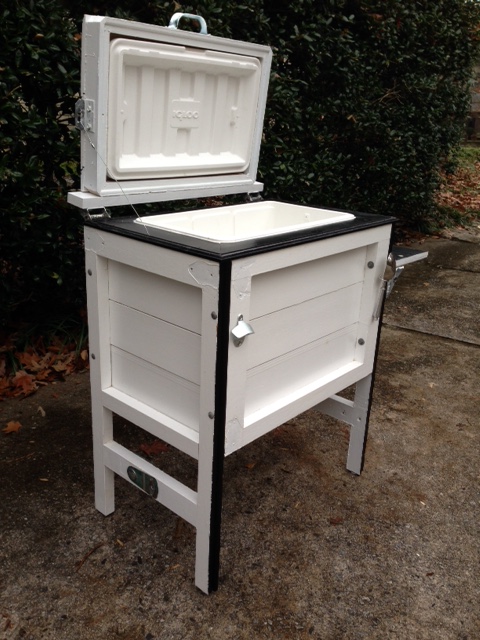
This is the completed project – somewhat different from my initial vision. But lets go back a bit. I saw a cooler embedded into a wooden case and wanted to make one for my parents for Christmas. On a Saturday morning I headed out to buy a cooler and salvage some pallets to use for construction as seen on multiple blogs and http://www.homerepairtutor.com. The project was on!
Two dumpsters later I found a pallet that was semi-buried under a bunch of construction debris – I pushed these long panels out of that way and wedged the prize pallet out – it was nasty, broken and crooked. I was about to move on until I noticed that the four long panels that I was pushing out of the way were sections of a garage door – and in great shape. Lesson one – don’t get too focused on the raw materials you seek when doing a salvage project! These are 100% better raw materials – and painted to boot.
The start of a project – maybe I need to paint the floor…
The first task was to do a rough estimate of the materials needed. I had only three door panels. Measuring the width of the cooler, I estimated that I could use two of the 1/4 paneled section horizontally as the front and back and other sections of the frame could be reconfigured vertically to make the sides.
Stripped off frame on 2nd panel
I used my circular saw cutoff jig to make equal side panels measuring in from the end to 34 inches – There are no dimensions in this blog because you need to make it work with the raw materials that you can find. It needs to be about kitchen counter height.
Circular saw cutoff jig
This is the cut off frame for the side panel. The garage door has fancy mortises holding the cross pieces in place – perfect!
End panel with cool shaped unpainted spots from the old hinges
To make the side panels match the front, the paneling has to be added back on horizontally. This paneling must be cut to give clearance for the front and back panel to be inset and bolted – more on that later.
Once I got started I felt a sense of challenge to use as much of the salvaged material as possible. I used the door hinges to support the side table. These had to be attached before the sides were bolted to the front and back as I reused the blind carriage bolts that are inserted from the inside.
Side panel – paneling attached and now hinges added – note that the bottom thick cross member had to be added as well – the paneling is nailed to it from the back so nothing fancy needed to join it.
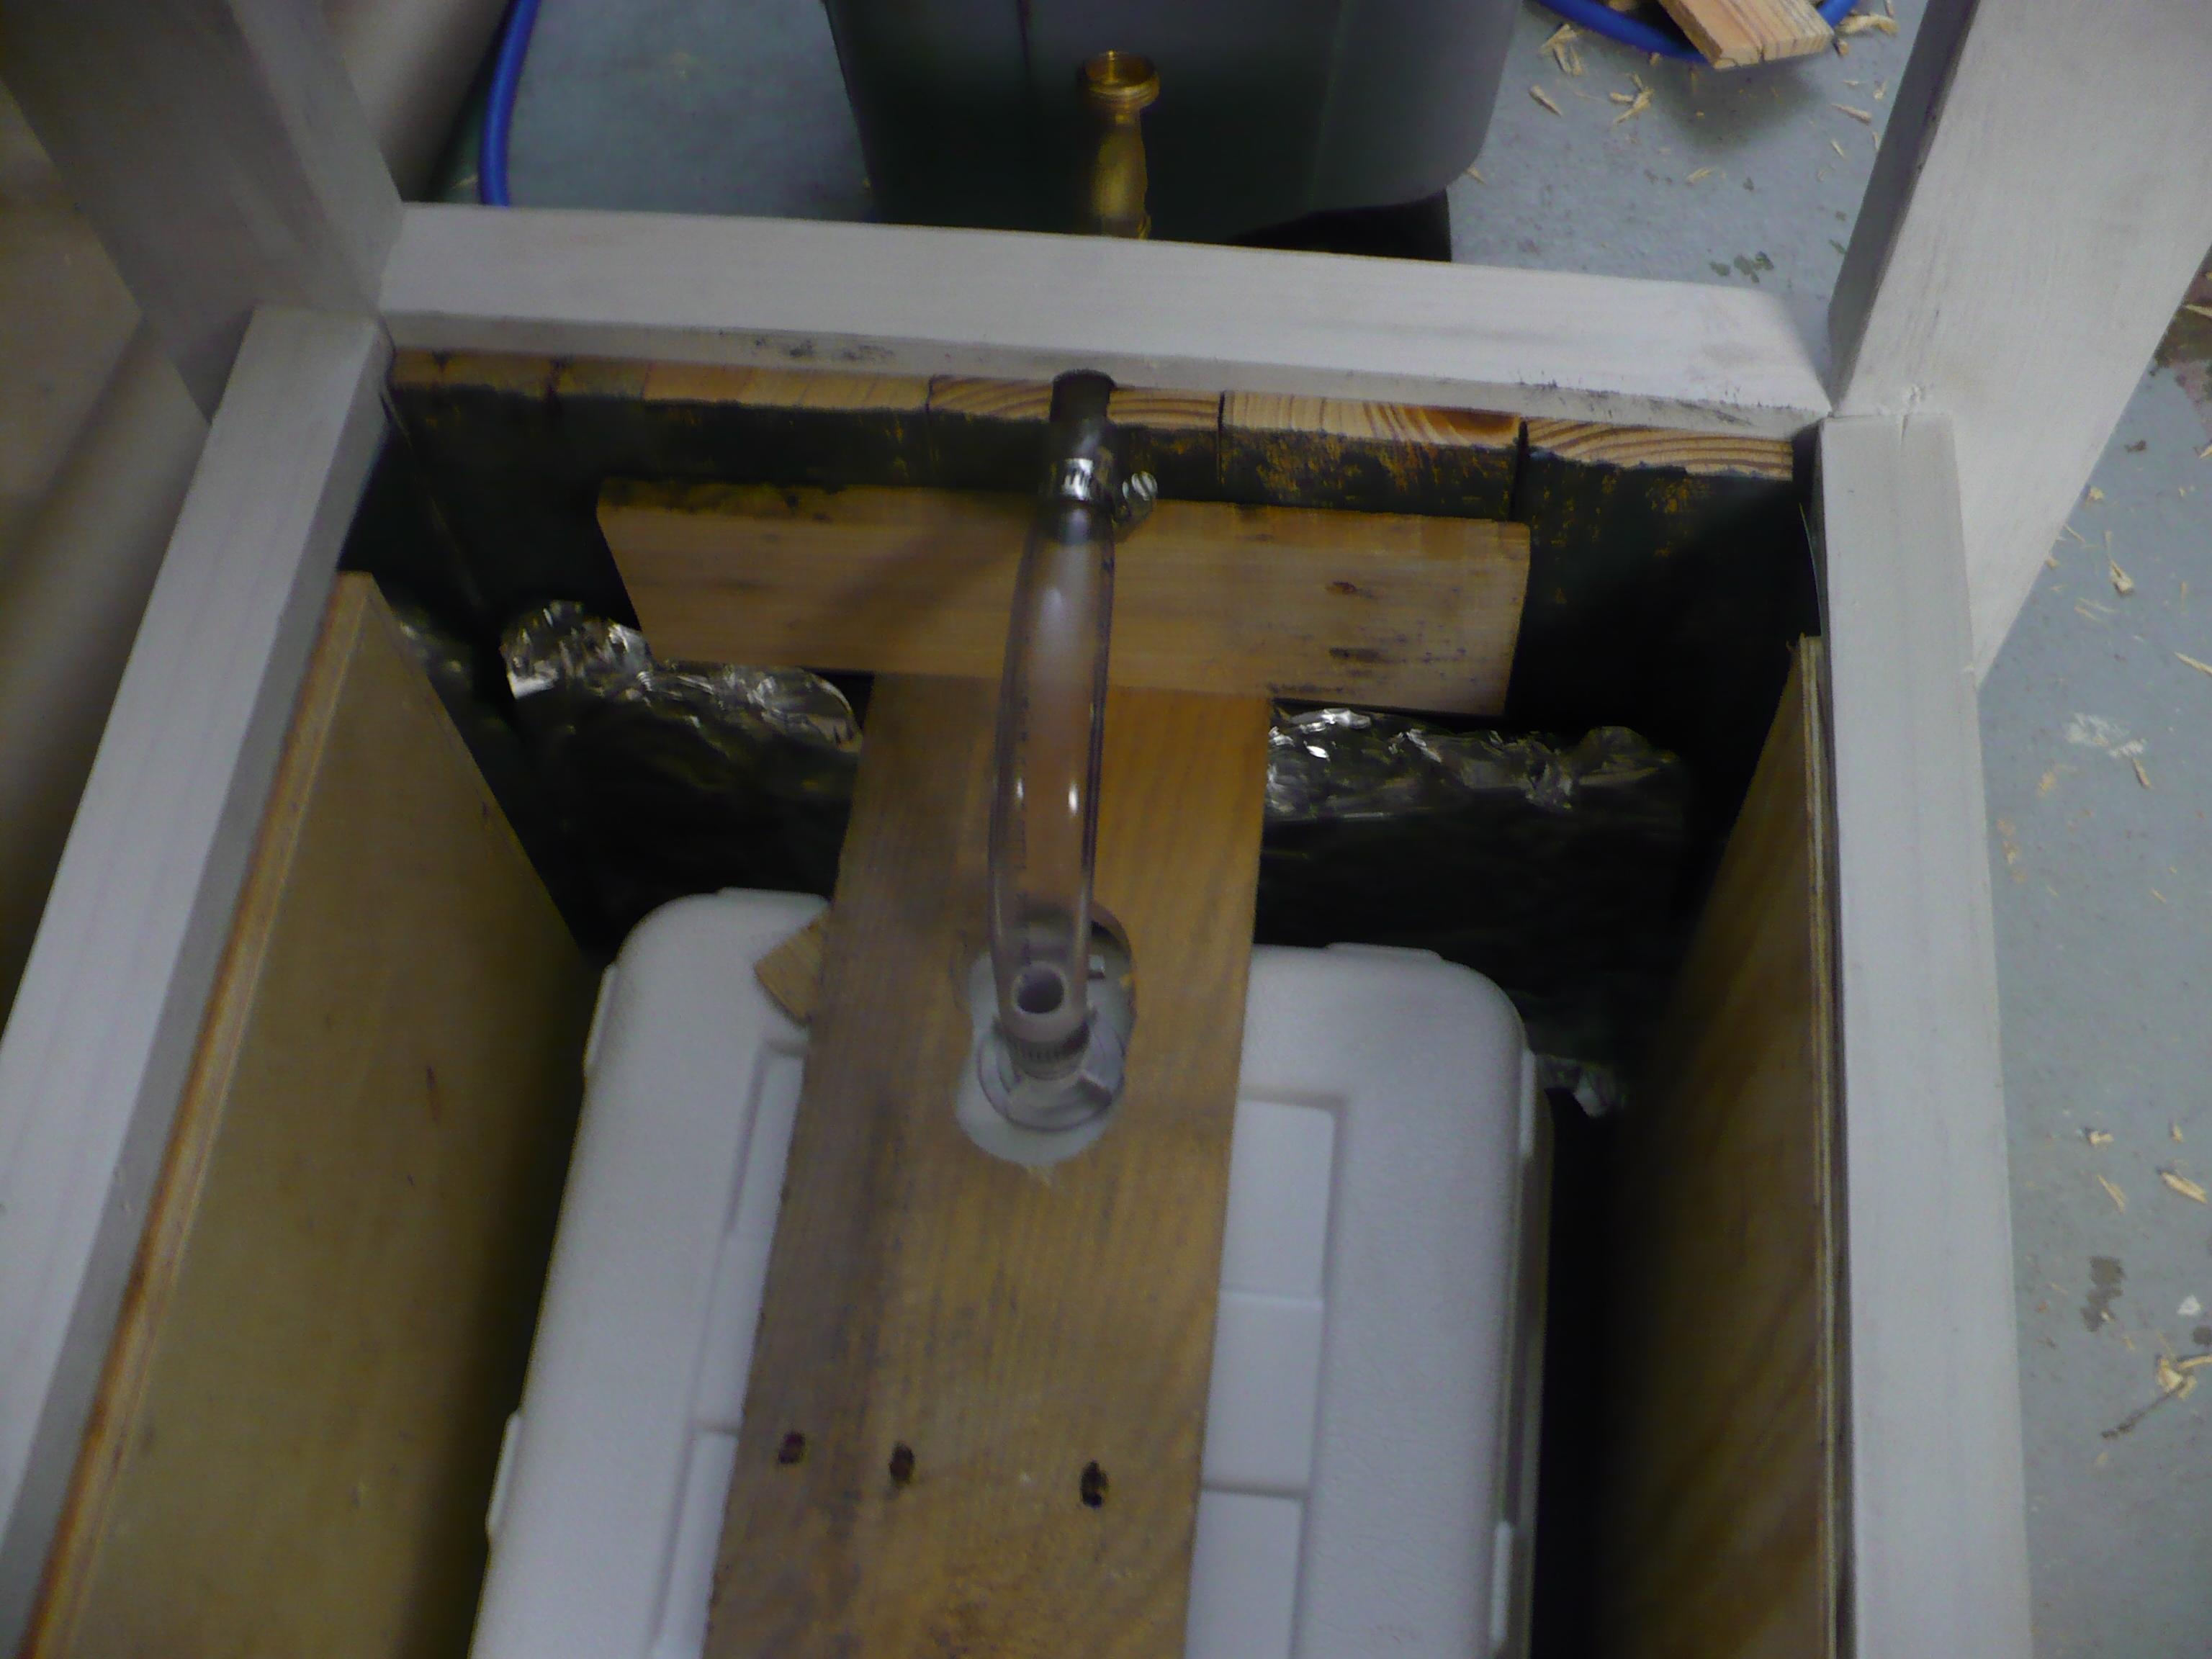
And heck – while I had a flat panel that is easy to set on sawhorses – I added some plumbing. This cooler is not something you tip over to empty, so a drain is a definite must!
Here is where I get a little over the top. I liked the look of the spigot that you see above better than the type that has a screw in collar that would be much better suited to attach to a wooden cross member like this. Aesthetics is sometimes a curse I have. So – I found a galvanized threaded fitting that has nice big threads on it. I screwed that into a hole drilled into the wood. Unfortunately that leaves nothing to hook a hose onto. So, I fished around and found a stub fitting that you see here. I ground the threads off a bit and brazed it to the inside of the spigot threaded section. It passes through the galvanized fitting and sticks out through the wood cross-member where I attached a hose via a hose clamp.
I now had four panels that need some sort of joinery to hold them together. I thought of many different options to overlap leg supports – but the thickness of the material here lent itself to simply bolting. Lesson 2 – adjust your construction to your materials.
Front panel showing the nuts and washers holding the side panel on.
Easy to see – hard to drill – here is a helpful method. There are 8- 4 1/2 inch galvanized carriage bolts that go through the side panels and into the frame of the front and back panels.
Measure carefully where the hole starts and ends. The pencil mark is where the inside of the panel is on the other side. Then, clamp a square onto the work to visually align your drill as you make the 4 inch hole. View is from the top looking down.
Eight bolts later and wow it looks like a cooler stand! Note the carriage bolt heads on the side panel. You can see how the cabinet front and back are inset within the side panels. Earlier I mentioned the side paneling – the paneling that is nailed onto the inside of the side piece must be short enough so that the front and back panels can fit inset as shown here.
Eight bolts tightened and wow – it takes shape!
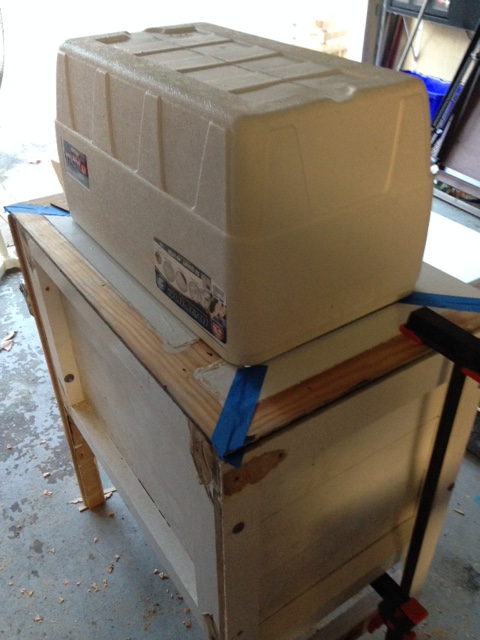
So this is a big empty box that won’t hold a cooler yet. It needs a rim for the cooler, a base for the cooler to stand on, and a lid.
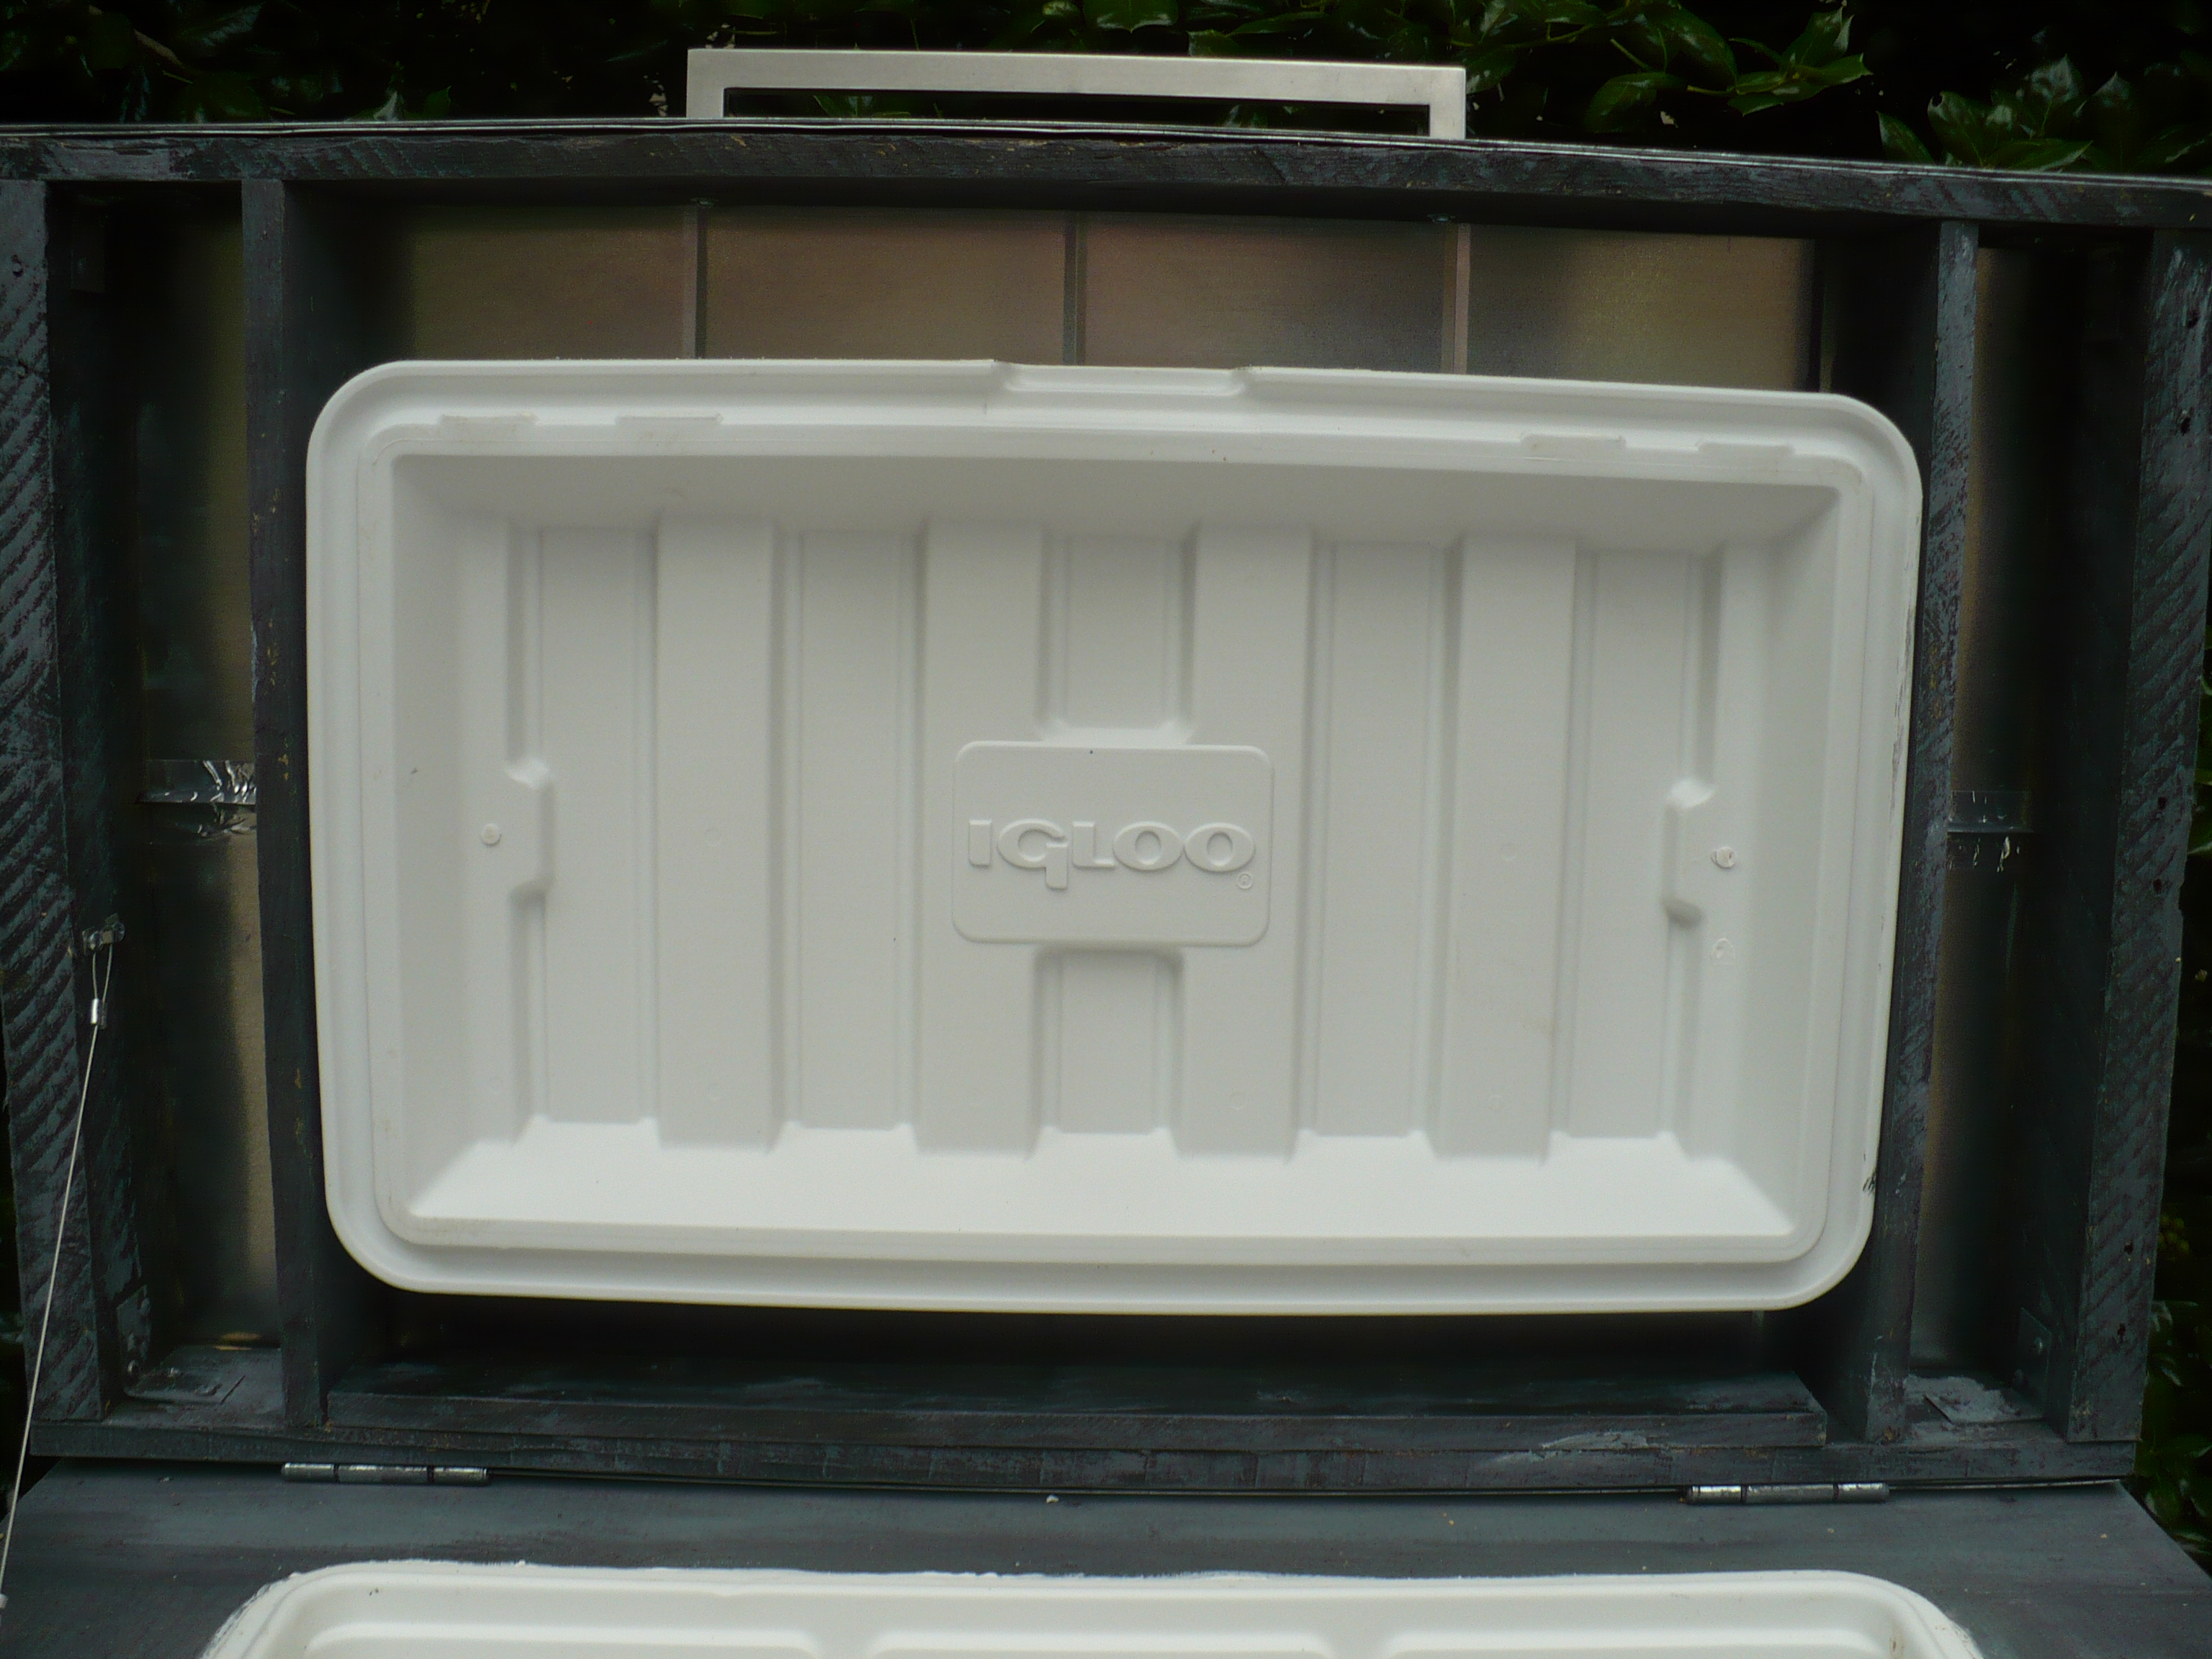
For the rim, I had just enough long pieces of the garage door paneling left and they are tongue and groove so the edge is decorative. I cut 4 pieces with 45 degree angles into a square frame. I made sure the opening was slightly smaller than the cooler. I used painters-tape to temporarily hold them together and flipped them to cut the opening with a jigsaw. (It is a neater cut from the bottom with the jigsaw since the blade is pulled to cut)
Cooler flipped to mark the bottom of the rim – clamped upside down.Cut complete and rim nailed to the perimeter.
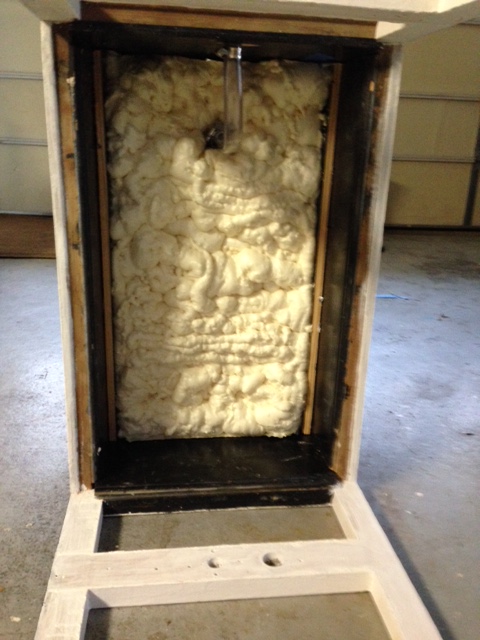
This Igloo cooler is pretty basic – thin walls and the top is not even insulated. To make it perform better I took advantage of the extra space and covered the cooler with expanding foam insulation. I caulked the cooler into the top rim first so that the expanded foam would not show. I also taped aluminum foil to the sides so that the foam would not seep through the cracks of the panels of the sides. Overkill you say? guilty. Lesson 3 – have a deadline or you will keep coming up with cool additions to your project and never finish- wait, I could add a light that comes on when you open the cooler…..
Bottom view – After the cooler is pushed into the rim I pushed a support frame up from the bottom for the cooler to rest on (white wood frame with drips screwed into the sides) one can of great stuff done here.
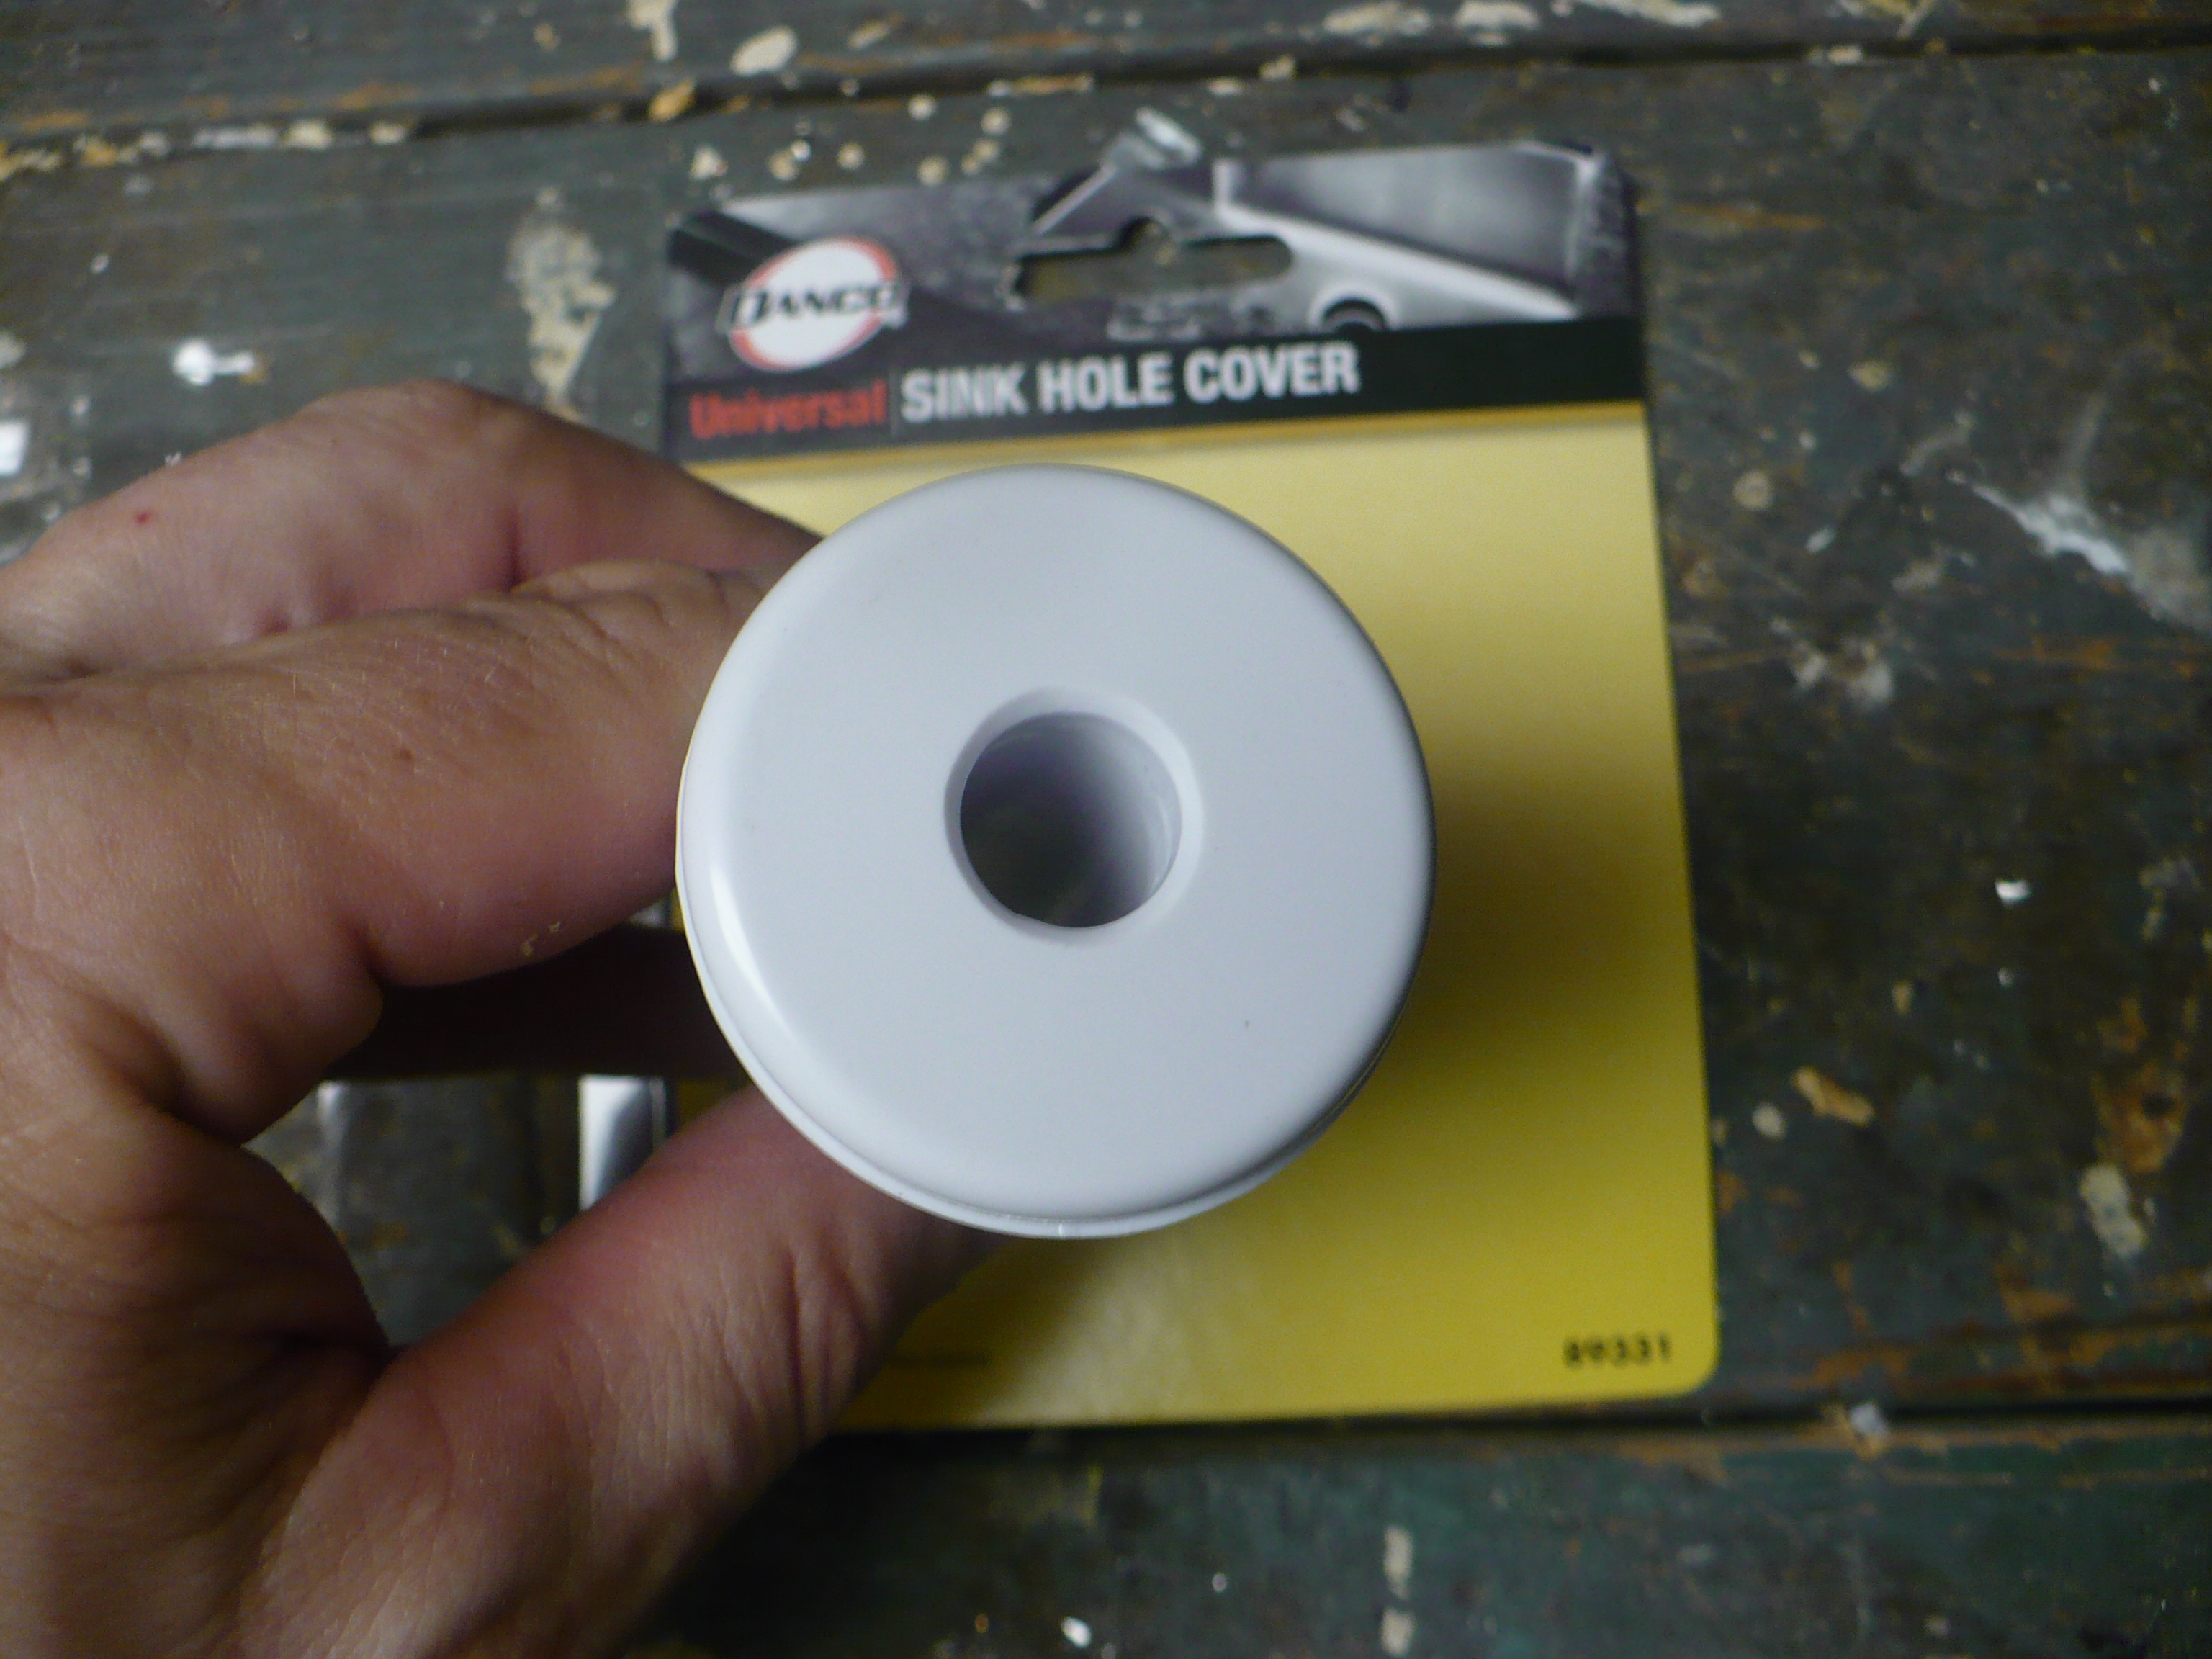
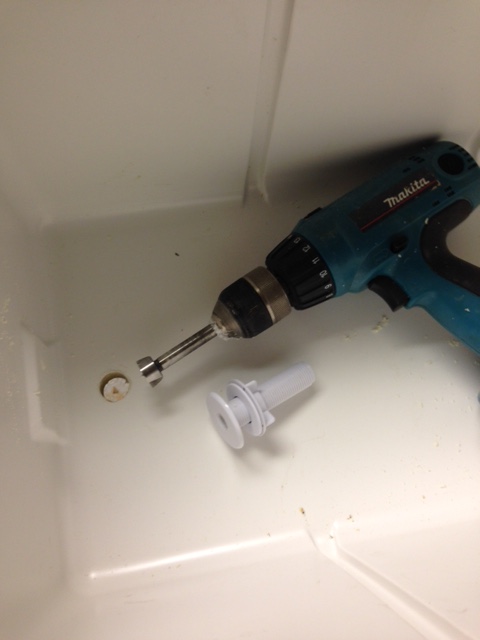
A few cans of Great stuff later and it will be super insulated. The cooler I used did not have a drain on the side so I drilled through the bottom. Tip – you can used a sink hole cap found at Lowes and drill out the top to make a drain. Attach a hose from this drain and to the spigot and you are all set.
Hole drilled and adapted sink hole cap shownFinal bottom view – much better insulation than a stock cooler!
Back to the top. I assembled a couple more garage door panel scraps into a lid. It is deep enough for the cooler lid with a bit of room to spare. I closed the plastic lid, rested the wood lid in place and then put four long screws into the lid from the side – making sure they didn’t penetrate to the inside of the lid.
And that is it. Some paint added to protect the wood and touch up the look and it is ready for summer parties. I added handles, feet, an ice scoop, a bottle opener and added back the garage lock mechanism on the side leg panel just for looks. Not shown very well, but as you can imagine, the lid hinges are garage hinges. The lid limiter is a bicycle cable with an aluminium swage fitting pressed on.
More than you wanted to know, I am sure, but hey it was a fun project. Total bill of materials was something like this:
2 – 9 foot wooden garage panels – free! (1 is left over for the next project)
1 cooler
1 brass hose spigot
1 threaded stub
1 galvanized reduction fitting
1 1 foot vinyl tube
2 hose clamps
1 garage door handle (no handle on the original door)