This was my image of how the garden wagon looked that was stored under the porch.

Let me go back. I needed a way to transport my Big Green Egg(R) for events and for backyard pizza demos. I found out that my father-in -law had a cart like the one pictured above. He warned me that it had been outside for some time, but I was welcome to it. The price was right. (I was not thinking of an Upconfigured entry so my photography of the “before” is not very thorough)
There is one other challenge in this story. The wagon must fit on a scooter tray that fits in a trailer receiver – that means 28″ wide. So, I started with a survey and found that the cart was in pretty poor shape. I decided to persevere. Upconfiguring never starts pretty!


Turns out all of the plywood was a write-off. It was good material originally, but the years spent outdoors had compromised the layers. I pulled all of the metal off the cart and made a big pile. Most of the metal was in good shape, given a little hammered spray-paint treatment for aesthetics.
The wagon was 36 inches wide, so I took all the cross pieces and figured out where to cut them for the least impact. I mitered the corner of this piece shown below and bent it to make a smooth corner edge.

I purchased exterior plywood and a whole new set of nuts and bolts. While checking out at Lowes I realized that it probably would have been a better idea to buy a new cart! But – onward.
I now had a rusty pile of parts, a new sheet of plywood. and a bag of connectors. It was time to figure out how this cart should look. I did some Sketchup work. I arrived at this 3D drawing. (The BGE, umbrella and wheels are all imported drawings – thanks to the Sketchup community for making them public)

When cutting the sides out of the plywood, I discovered that there are two kinds of 1/2 inch plywood – the kind that is a little thinner than 1/2 and the kind that is a little thicker than a half. I picked a sheet that had a better face and better ply structure, not paying any attention to the specific thickness. Low and behold none of the metal edging would fit – I hate it when I feel like an amateur at DIY projects. So, now I needed to break out the router and trim a small edge wherever there would be a metal border.

It added an hour or so, but in the end thicker plywood makes it a sturdier cart – right?
I began putting all the pieces together and the cart took shape. With my width requirement and the size of the egg, I had to raise the body between the spokes – a couple 2X4’s made a good riser. The axle is bolted to the bottom.

I could not build the front posts for the caster wheels until I knew the back height with tires. I assembled the big wheels with new tires and then created the appropriate height risers for my 5″ casters. The plywood was a left over piece from the other cutouts and gave it a better look than just the posts as in my initial plan.

A 600F degree BGE would be mounted on the back so I added aluminum flashing around the inside and under some Hardie-backer used to protect the floor board. I am hoping the aluminum will reflect the heat so that the plywood does not get too hot.

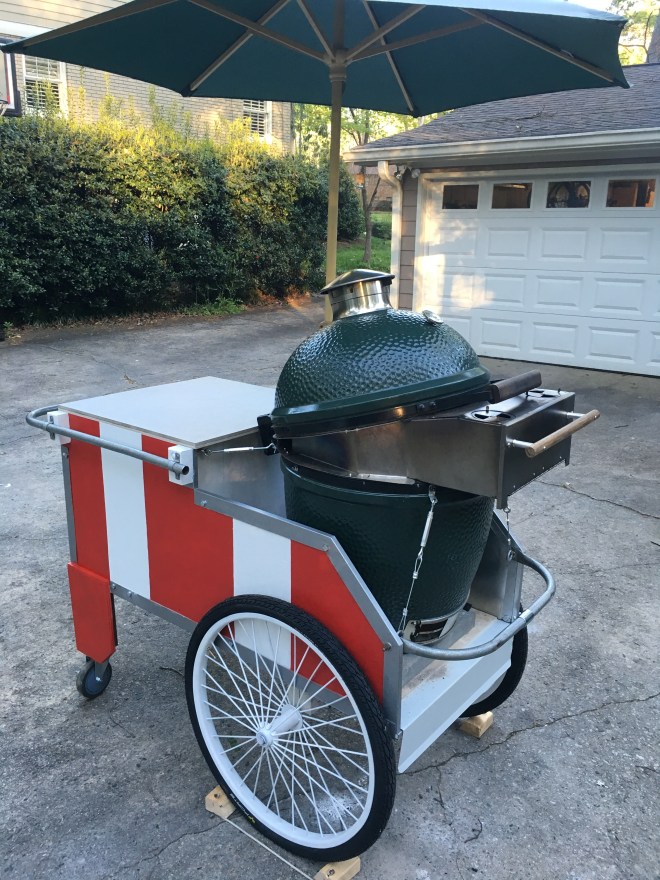
Finally it was ready for the BGE.
I placed “the Egg” in and added some small steel angle brackets bolted to its hinge ring. I added turnbuckles to the four corners and tightened it in. This suspension should keep the egg from tipping out of the cart.

The sides are obviously not strong enough to hold the weight of the egg, so I cut one of the wagon parts to span the opening by the eyelets. This will support the edges and the cable fittings with turnbuckles will hold the BGE in place. Note that I glued a cement block to the floor. After further thought I will be adding a small ledge around the egg base so there will be even less chance of movement.

The flat surface behind the BGE is a 23″X23″ ceramic tile glued to a Hardie-Back panel. I simply glued the whole assembly on to this cart.
One final design point. This cart may seem to have a weird configuration. The prep side is on the other end from the business side of the BGE. The 28″ requirement kept the cart narrow, and the extra weight of the egg needed to be over the big wheels, not the casters. For my pizza cooking, this works pretty well since pizza prep is separate from putting things in the oven, but for basic BBQ operations the table seems in the wrong place when you want to set down a tray. Something to think about if you are making a cart.
So, that is it. An old rusty, rotten cart upconfigured to an event trailer for the Big Green Egg. I added an umbrella holder, made some chocks, and will be putting in some shelves. I did a pizza cook test and the aluminum flashing is amazing at protecting the wood from heat. The edges closest the the base reached only 130F degrees after 2.5 hours of a 600F degree cook. I am excited that this worked so well.
One final consideration – I will be removing the fragile ceramic internal bits inside the Egg before I push this across a large expanse.
Thanks for reading, Here are some final pictures. Subscribe to see more projects in the future!